


Announcing the new Ultralytics YOLO support for automatic annotation via CVAT agents.
Powerful computer vision libraries such as Ultralytics YOLO, Detectron2, and MMDetection have made it easier to train high-performing models for a wide variety of tasks. However, using these models for automated annotation often requires custom code, format conversions, and one-off integrations, especially when labeling workflows span multiple tasks. As a result, many teams fall back on manual labeling because they find automation too complex to adopt at scale.
Ultralytics YOLO is one of the most widely used model families in the computer vision community. Until now, CVAT included a single built-in YOLO model for auto-annotation, but expanding beyond that required manual setup.
That's why we're excited to announce our new integration with Ultralytics YOLO via the CVAT AI annotation agent.
Introducing the new Ultralytics YOLO and CVAT integration
With this new integration, you can use native Ultralytics models (YOLOv5, YOLOv8, YOLO11) and third-party YOLO models with Ultralytics compatibility (YOLOv7, YOLOv10, etc.) for automatic image or video annotation for a wide range of computer vision tasks, including:
- Classification
- Object detection
- Instance segmentation
- Oriented object detection
- Pose estimation
Just pick a YOLO model you want to label your dataset with, connect it to CVAT via the agent, run the agent, and get fully labeled frames or even entire datasets, complete with the right shapes and attributes, and all, in a fraction of the time.
Annotation possibilities unlocked
This integration opens up multiple workflow optimization and automation opportunities for ML and AI teams. Here are just a few.
(1) Pre-label data using the right model for the task
Connect the YOLO models that match your annotation goals and run them sequentially to pre-label your data. Each model can be triggered individually through the CVAT interface, allowing you to generate different types of labels for the same dataset without custom scripts or external tools. This works for any YOLO model, out-of-the-box or fine-tuned.
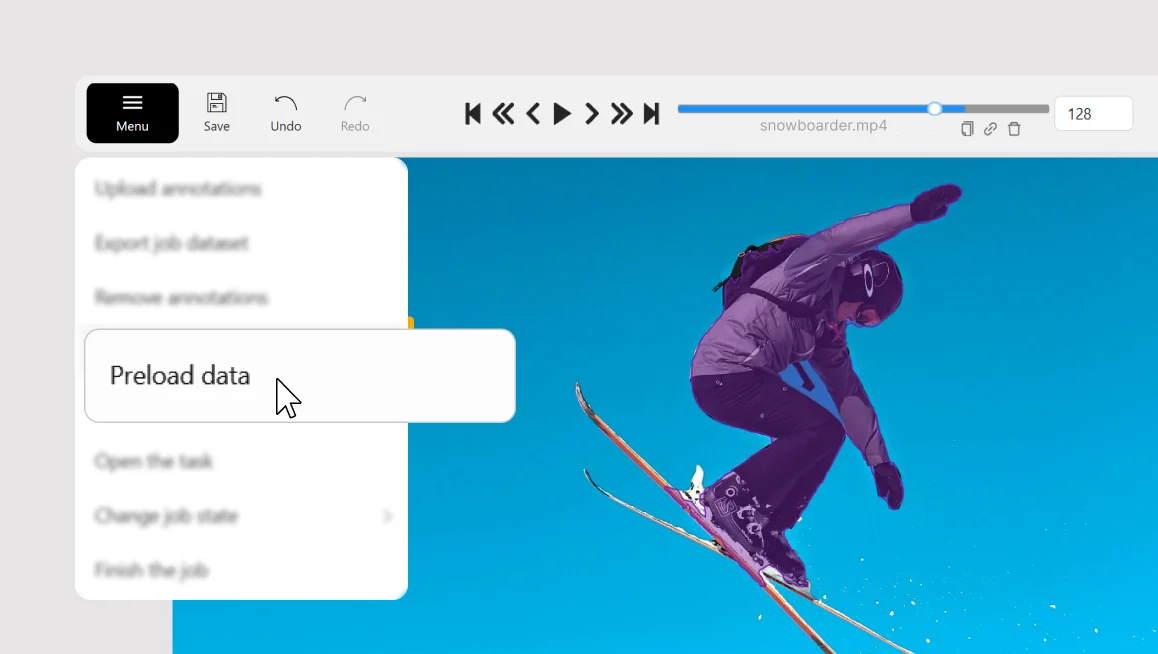
(2)Label entire tasks in bulk
Working with a large dataset? You don’t have to annotate each frame manually. Apply a YOLO model to the entire task in one step. Just open the Actions menu in your task and select Automatic annotation. CVAT will send the job to the agent and automatically annotate all frames across all jobs in a task, saving you time and reducing repetitive work.
(3) Share models across teams and projects
Register a model once via a native function and agent, and make it instantly available across your organization in CVAT. Team members can use it in their own tasks without any local setup.
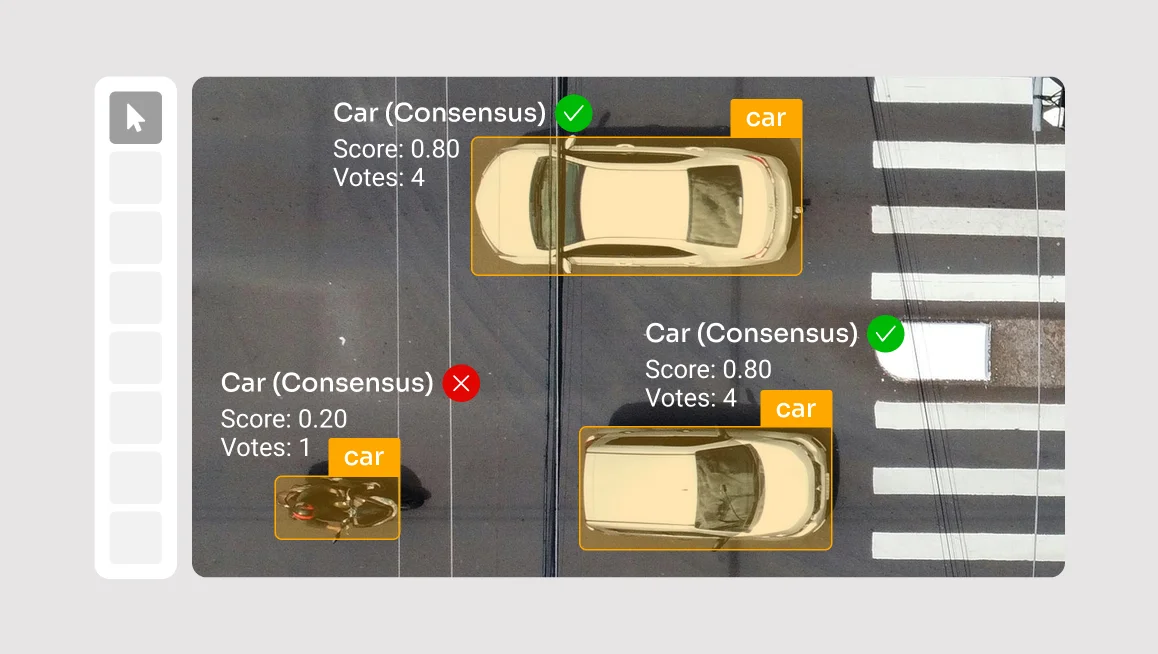
(4) Validate model performance on real data
Test your fine-tuned YOLO model directly on annotated datasets and compare its predictions side-by-side with human labels in CVAT. Spot mismatches, edge cases, or underperforming classes, all without leaving your annotation environment.
How it works
Here’s what a typical YOLO auto-annotation setup via agents looks like:
For more in-depth information about how to set up automated data annotation with a YOLO or any custom model using a CVAT AI agent, read this article.
Step 1. Write and register the function
Start by implementing a native function–a Python script that loads your YOLO model (e.g., yolov8n, yolo11m-seg) and defines how predictions will be generated and returned to CVAT. Then register this function in CVAT using the CLI.
Note: You can reuse the same native function both in CLI-based annotation and agent-based mode.
Step 2. Start the agent
Once the function is registered, launch an agent using the CLI command. This starts a local service that automatically connects to your account in CVAT Online or Enterprise, and listens for annotation requests from CVAT. The agent then runs the model (inside your function), generates predictions, and sends them back to CVAT.
Step 3. Create or select a task in CVAT
Log into your CVAT instance and create a new task (or select an existing one). Upload your images or video, and define the labels you want to annotate (e.g., "person", "car", "helmet"). Depending on your use case, you can define different types of labels such as bounding boxes, polygons, or skeletons to match the expected output from your model.
Step 4. Choose the model in the UI
Once your task and the job are created and the agent is running, go to the AI Tools panel inside your job. Select the Detector tab and the YOLO model you registered earlier.
Step 5. Run AI annotation on selected frames
After selecting the model, CVAT sends a request to the running agent. The agent runs the model and returns predictions in the form of shapes (e.g., boxes, polygons, or keypoints), each associated with a label ID.
Get started now
Ready to speed up your annotation workflow with YOLO? Sign in to your CVAT Online account and try it out yourself.
- For more information about Ultralytics YOLO models and the tasks they support, check the Ultralytics documentation page.
- For more information about CVAT AI annotation agents, check this article.


.svg)
.png)

.png)


.png)