


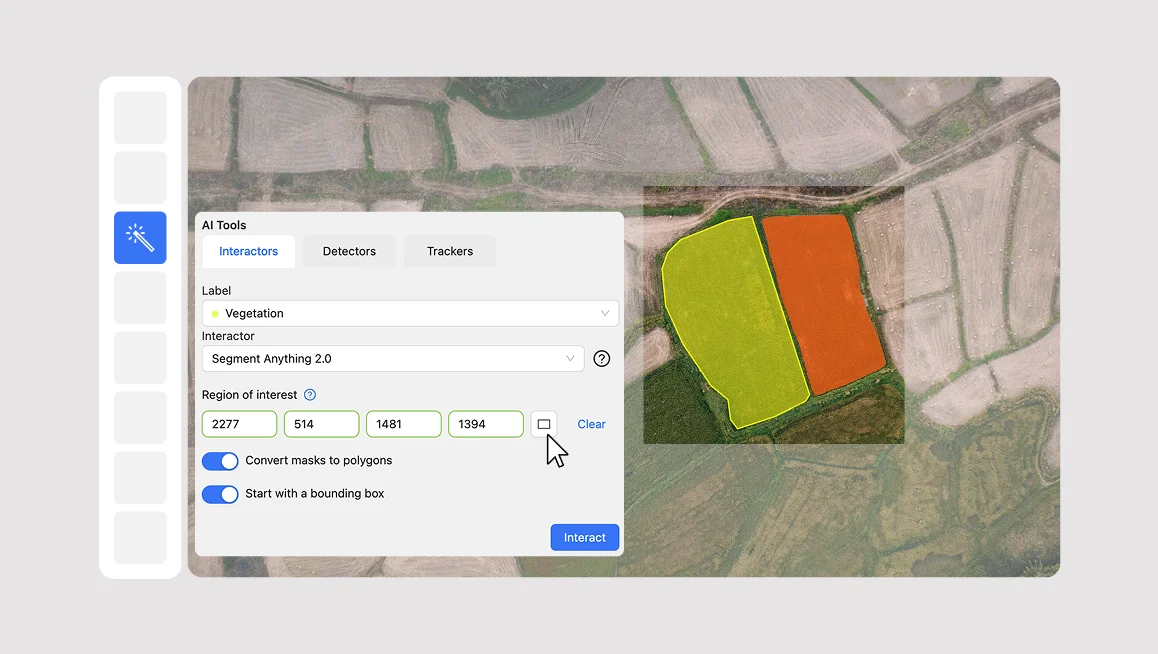
Automatic annotation works best when the model gets the right visual context. But real-world images are not always simple. Some frames contain many small, similar objects, such as seeds, cells, vehicles, or products on a shelf. Others include large areas that are irrelevant to the task, such as distorted edges from a fisheye camera, background regions, or parts of an image that do not need to be labeled at all.
In these cases, running a model on the full image can create extra work. The model may miss small details after the image is resized for inference, merge many similar objects into one mask, or return annotations in areas you never wanted to label. Annotators then need to clean up the output, remove unnecessary labels, or repeat the process with different settings.
To make automatic annotation more focused, and, in some cases, more accurate, CVAT now supports Region of Interest, or ROI.
What is Region of Interest?
Region of Interest lets you define a specific rectangular area of an image where a model should be applied.
Instead of running automatic annotation on the entire frame, you can select only the area you want the model to process. CVAT will then apply the selected detector or interactor inside that region.
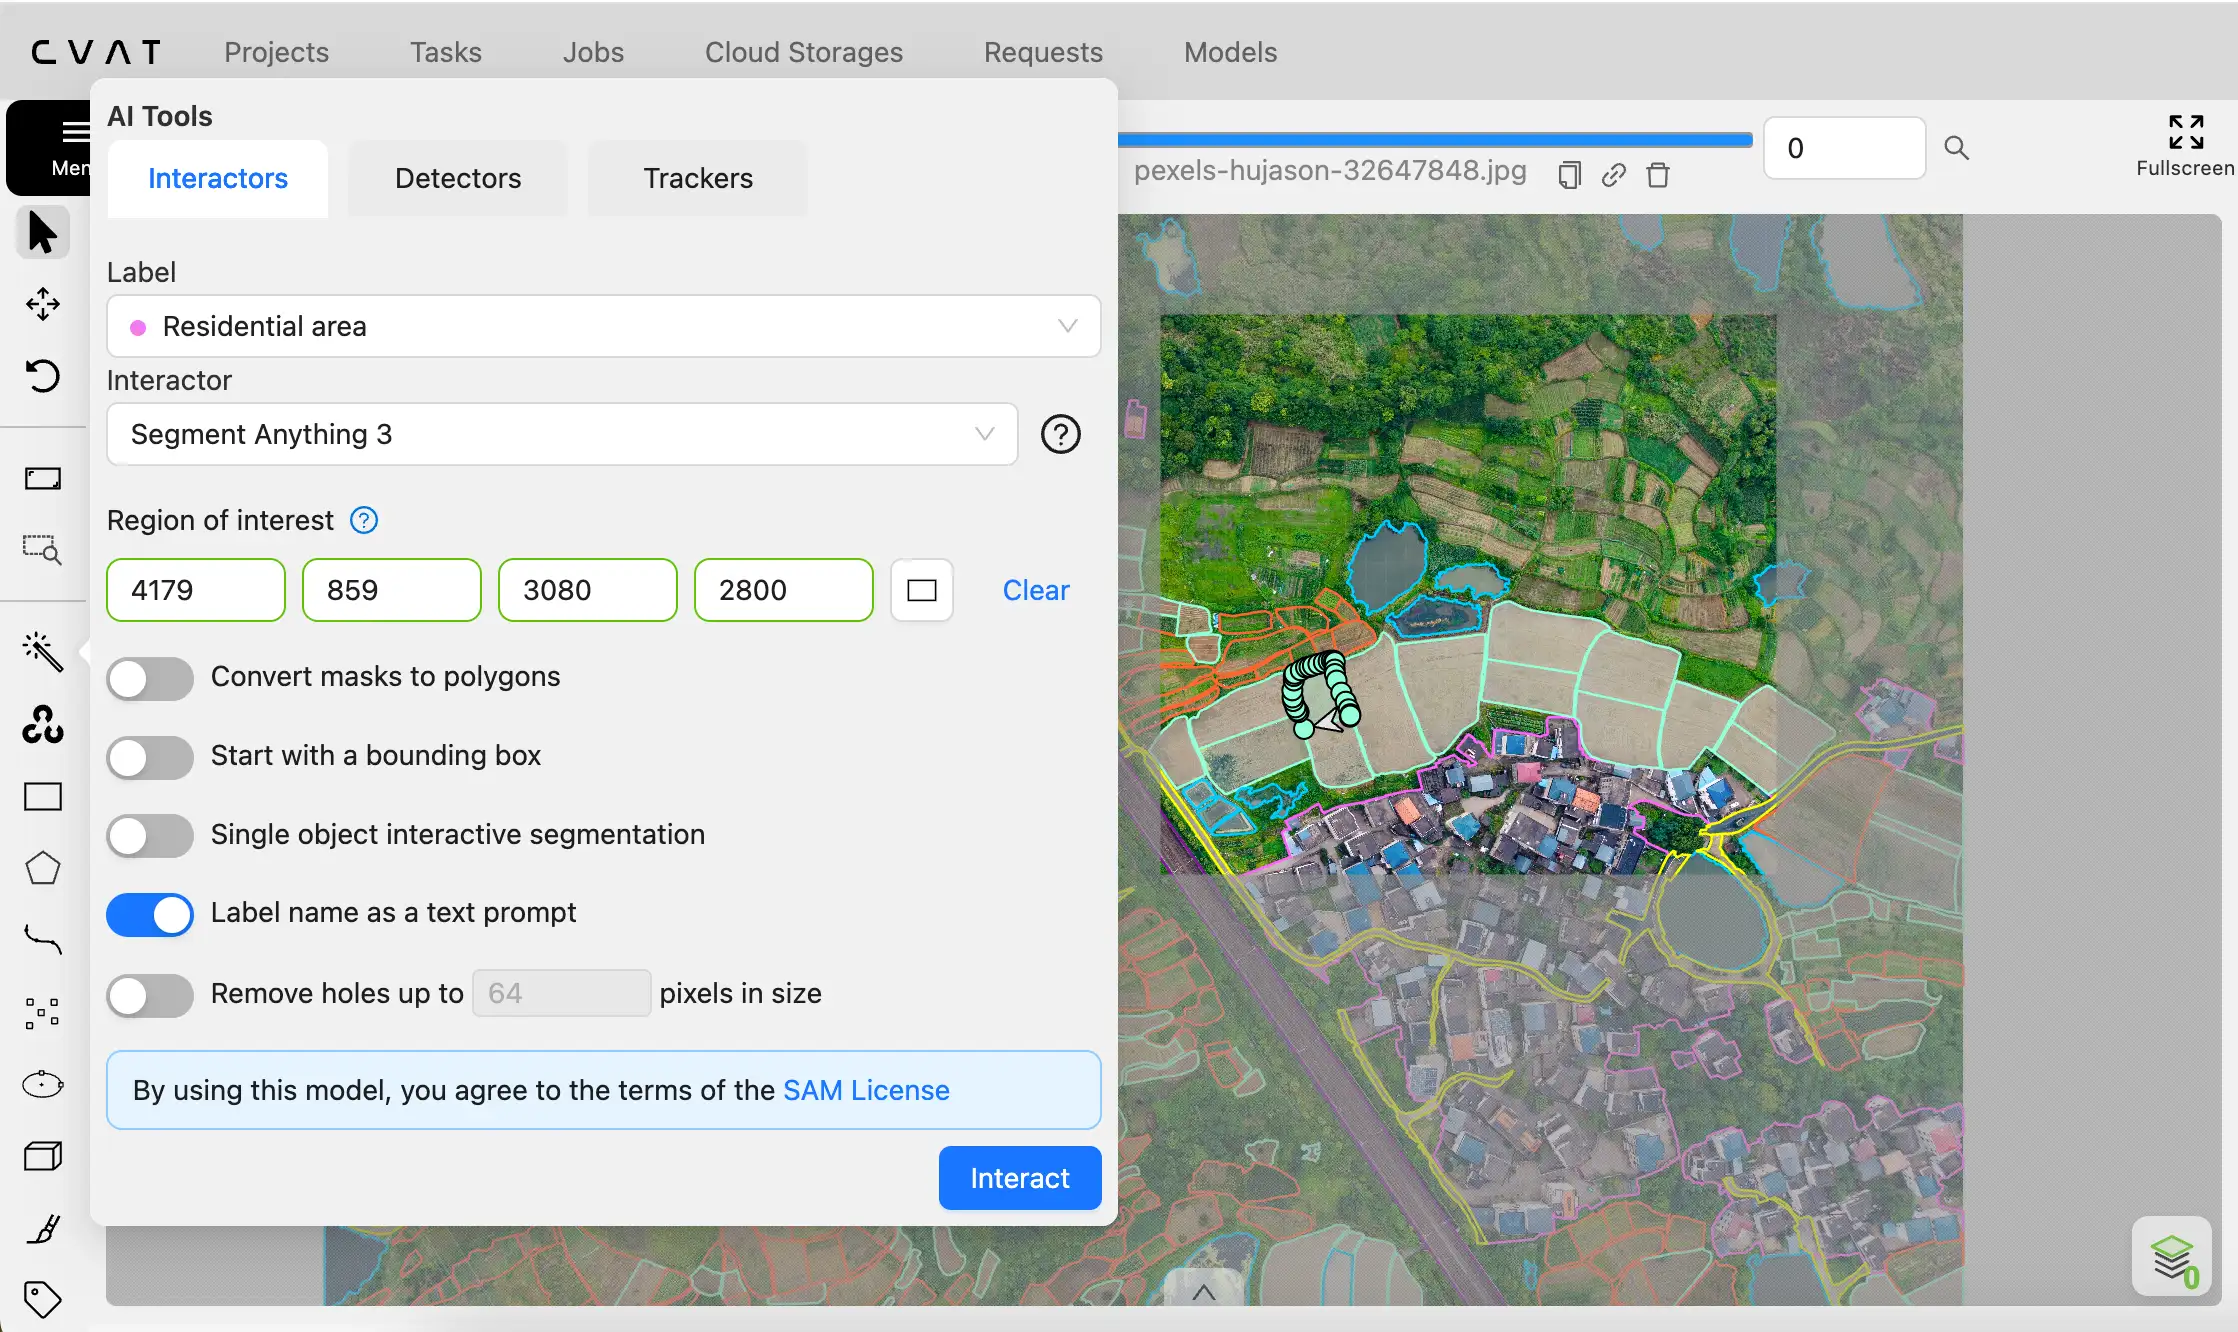
You can define the region in two ways:
- Enter the region coordinates manually using X, Y, width, and height values.
- Draw the region directly on the image.
Once the region is selected, automatic annotation runs only inside that area.
How Region of Interest works
Region of Interest is available in the automatic annotation flow. When you select a model, you can define the part of the image that should be processed before running the annotation. This works with both detectors and interactors.
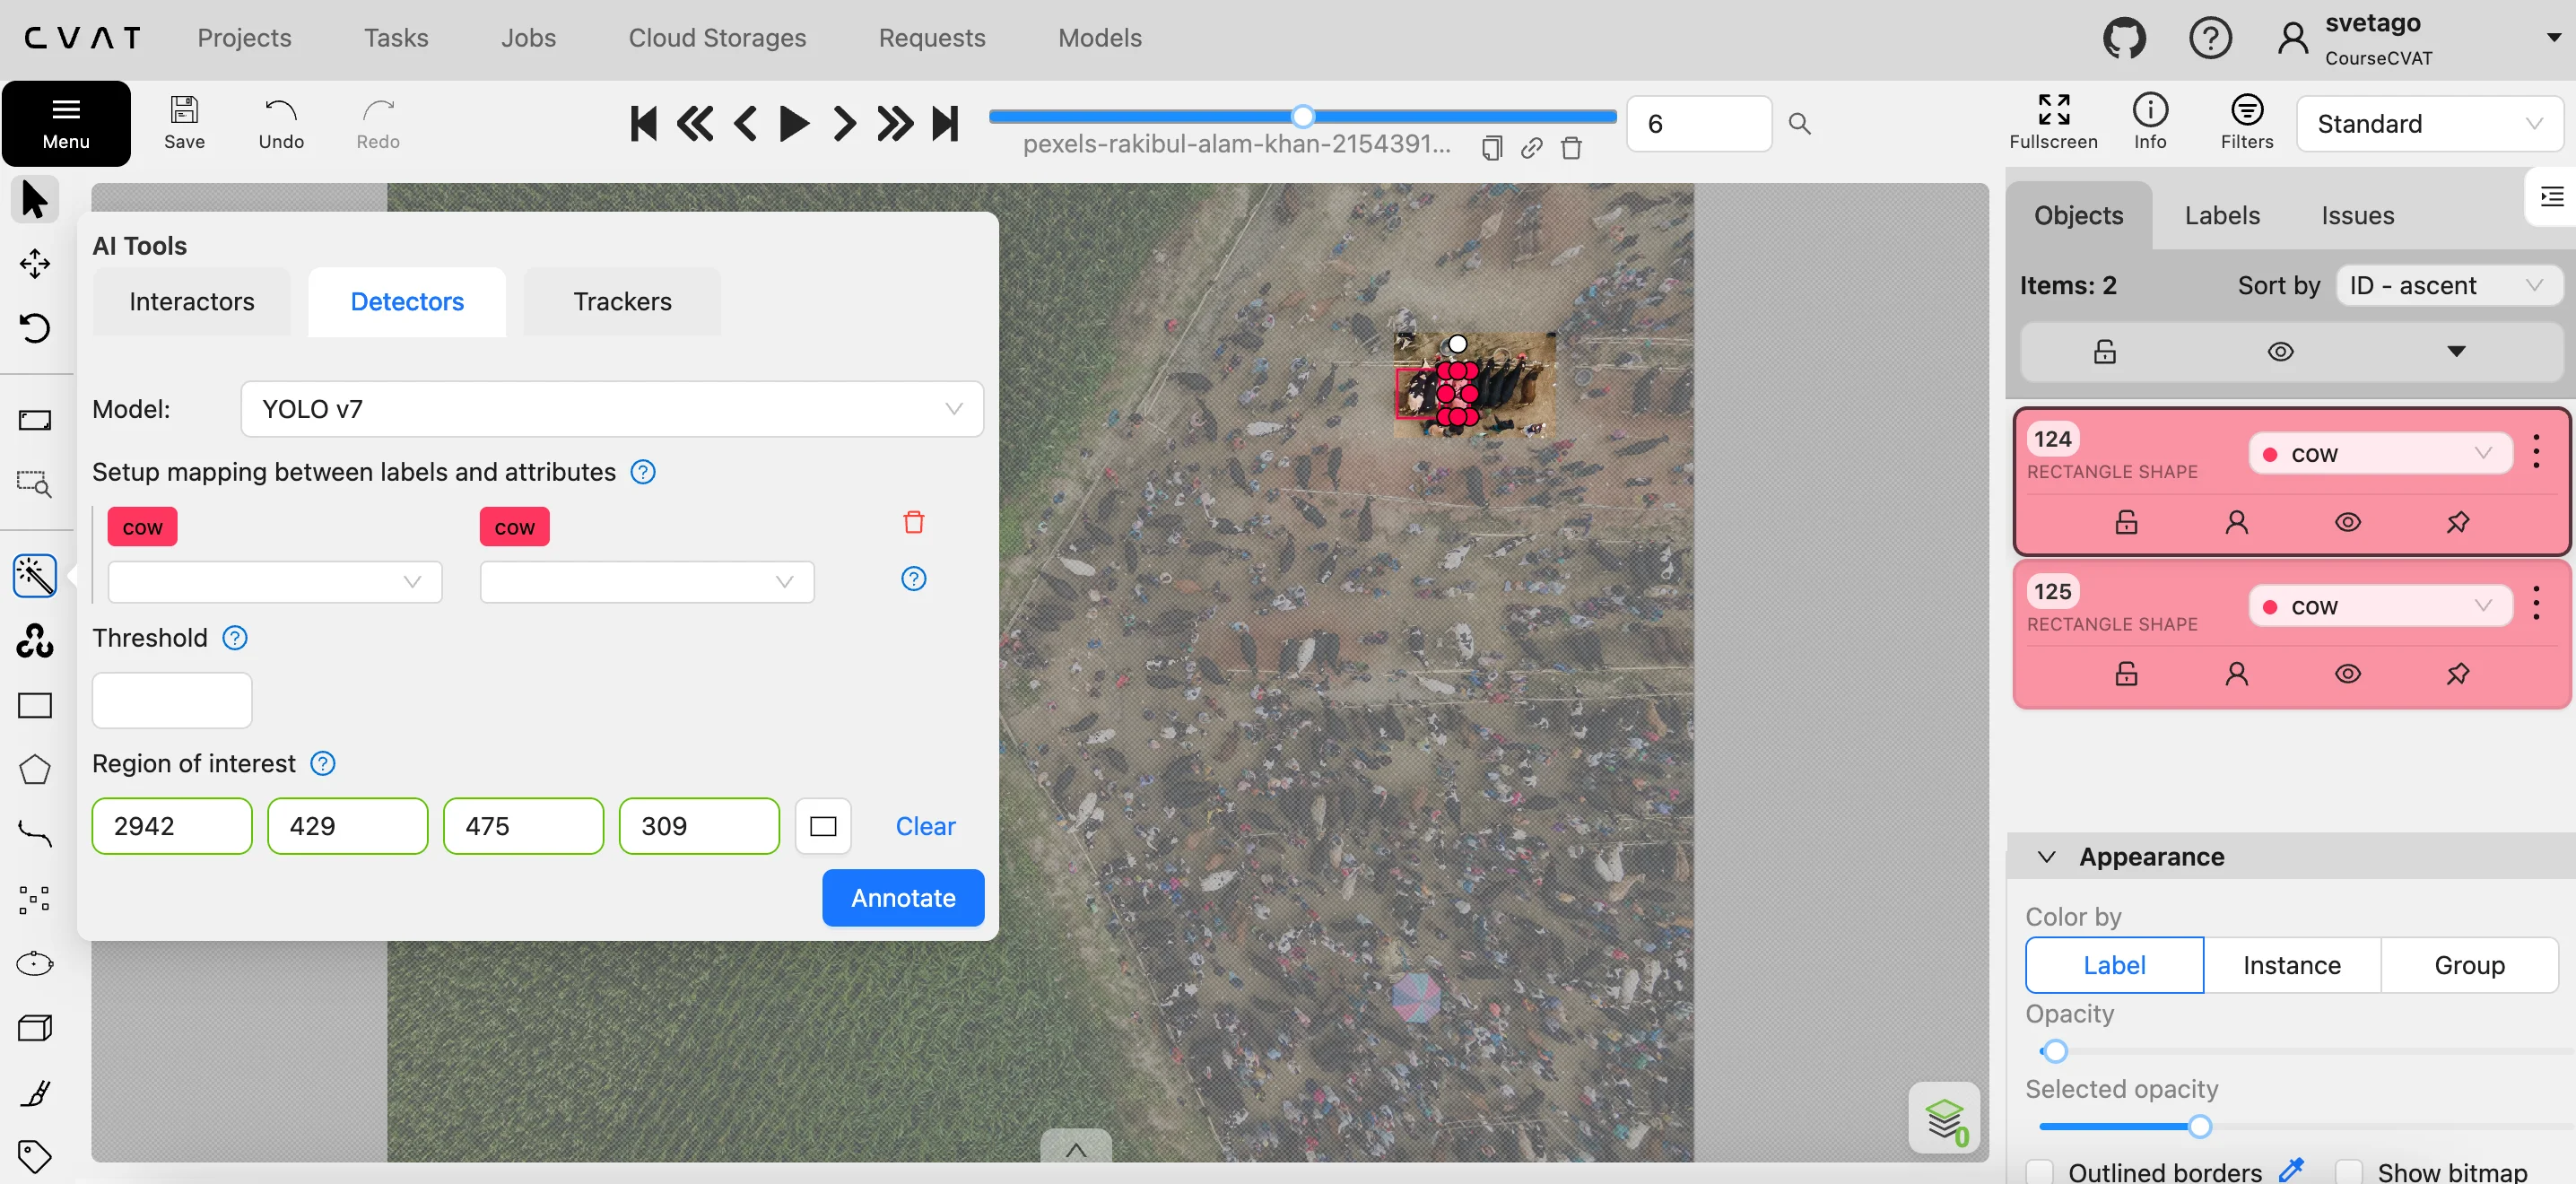
For detectors, ROI helps you limit detection to a specific area of the image. For example, if a camera view contains useful content only in the center, you can run detection only on that central region instead of processing the full frame.
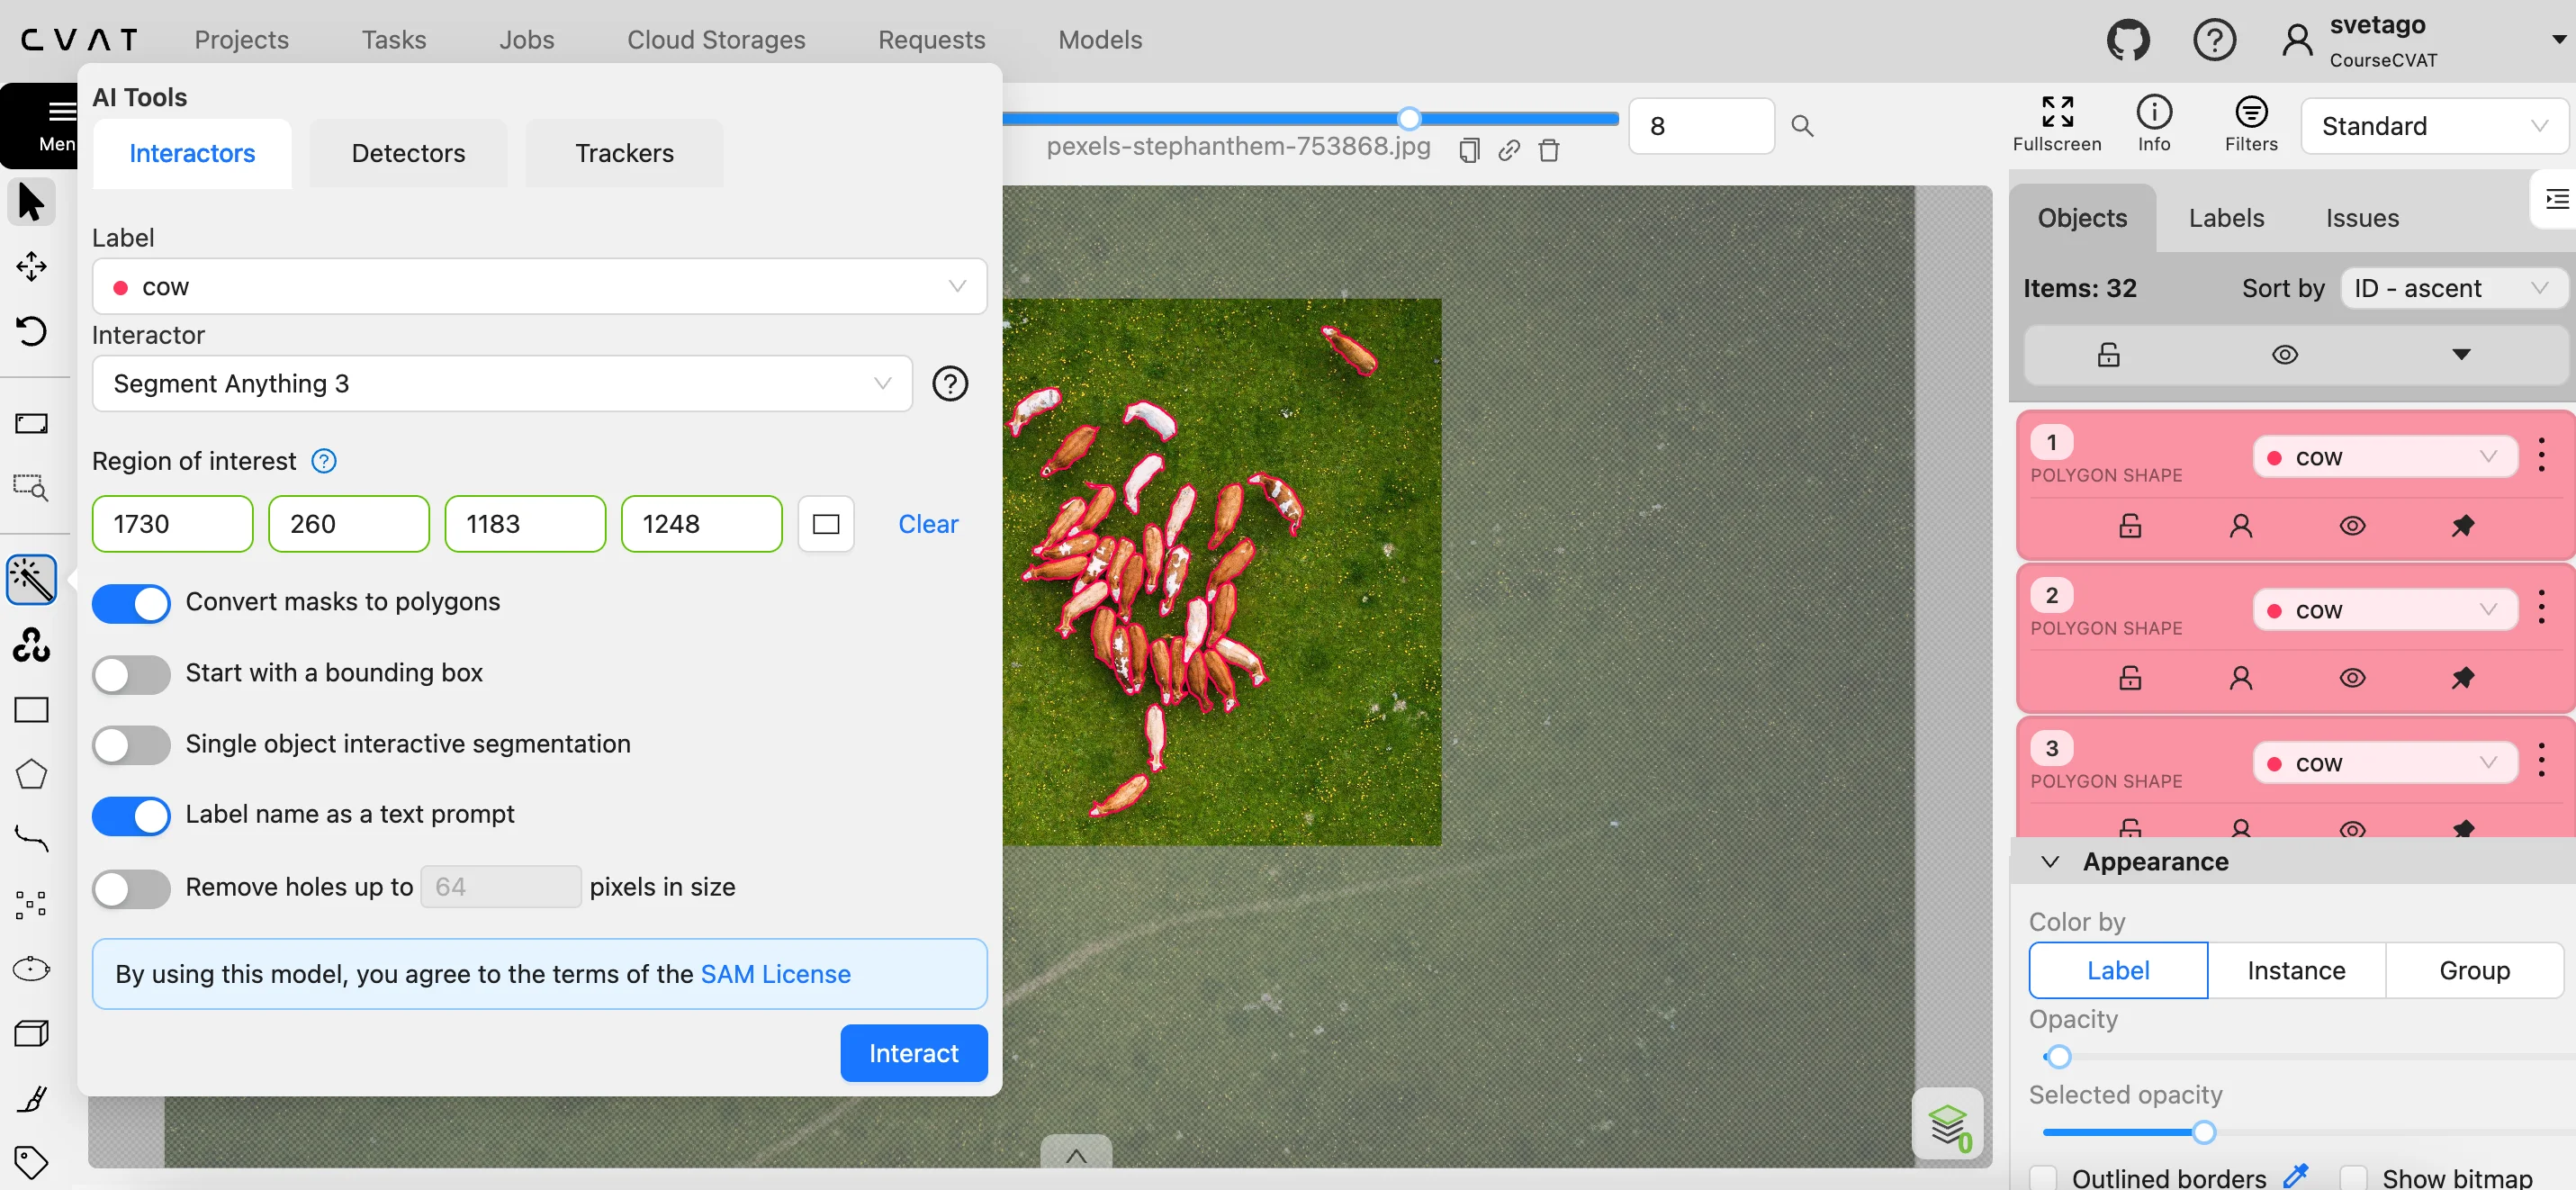
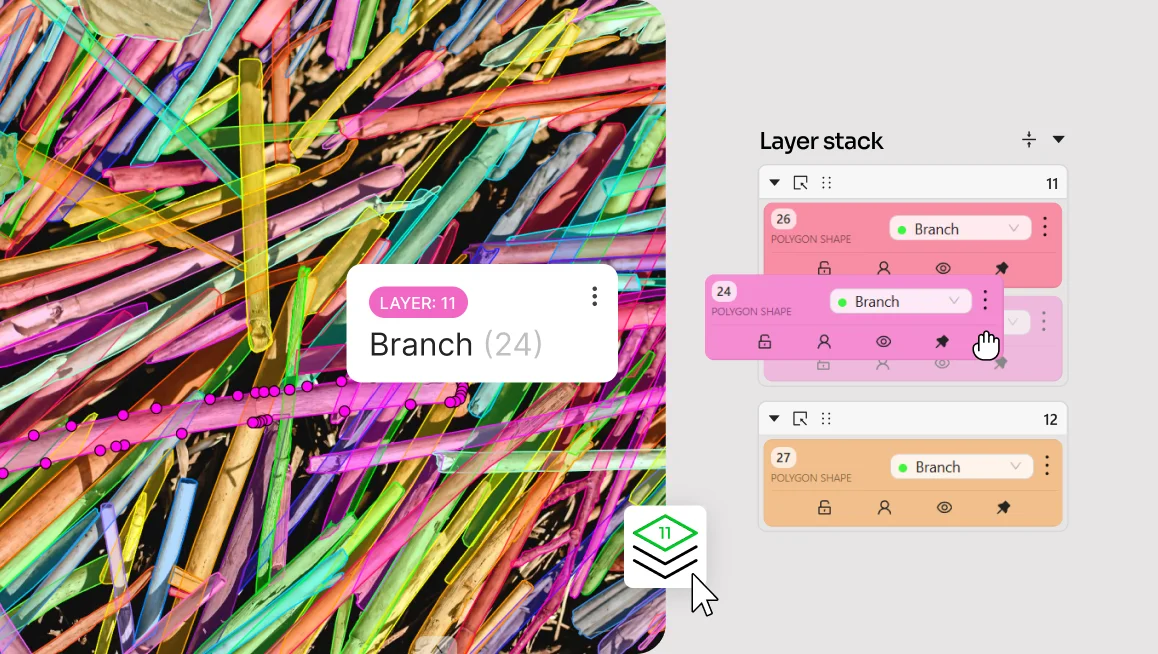
For interactors, ROI can help with dense images that contain many small or similar objects. Instead of asking the model to process the entire image at once, you can split the image into smaller regions and run the model several times. This can make the output easier to review and merge, especially when the full-image result is too noisy or incomplete.
Region of Interest can also help when working with high-resolution images. Many models resize large images before inference, which can make tiny objects harder to detect or segment. By selecting a smaller region, you give the model a more focused input area where small details may remain easier to recognize.
When to use Region of Interest
Region of Interest is especially useful when you need more control over where automatic annotation is applied.
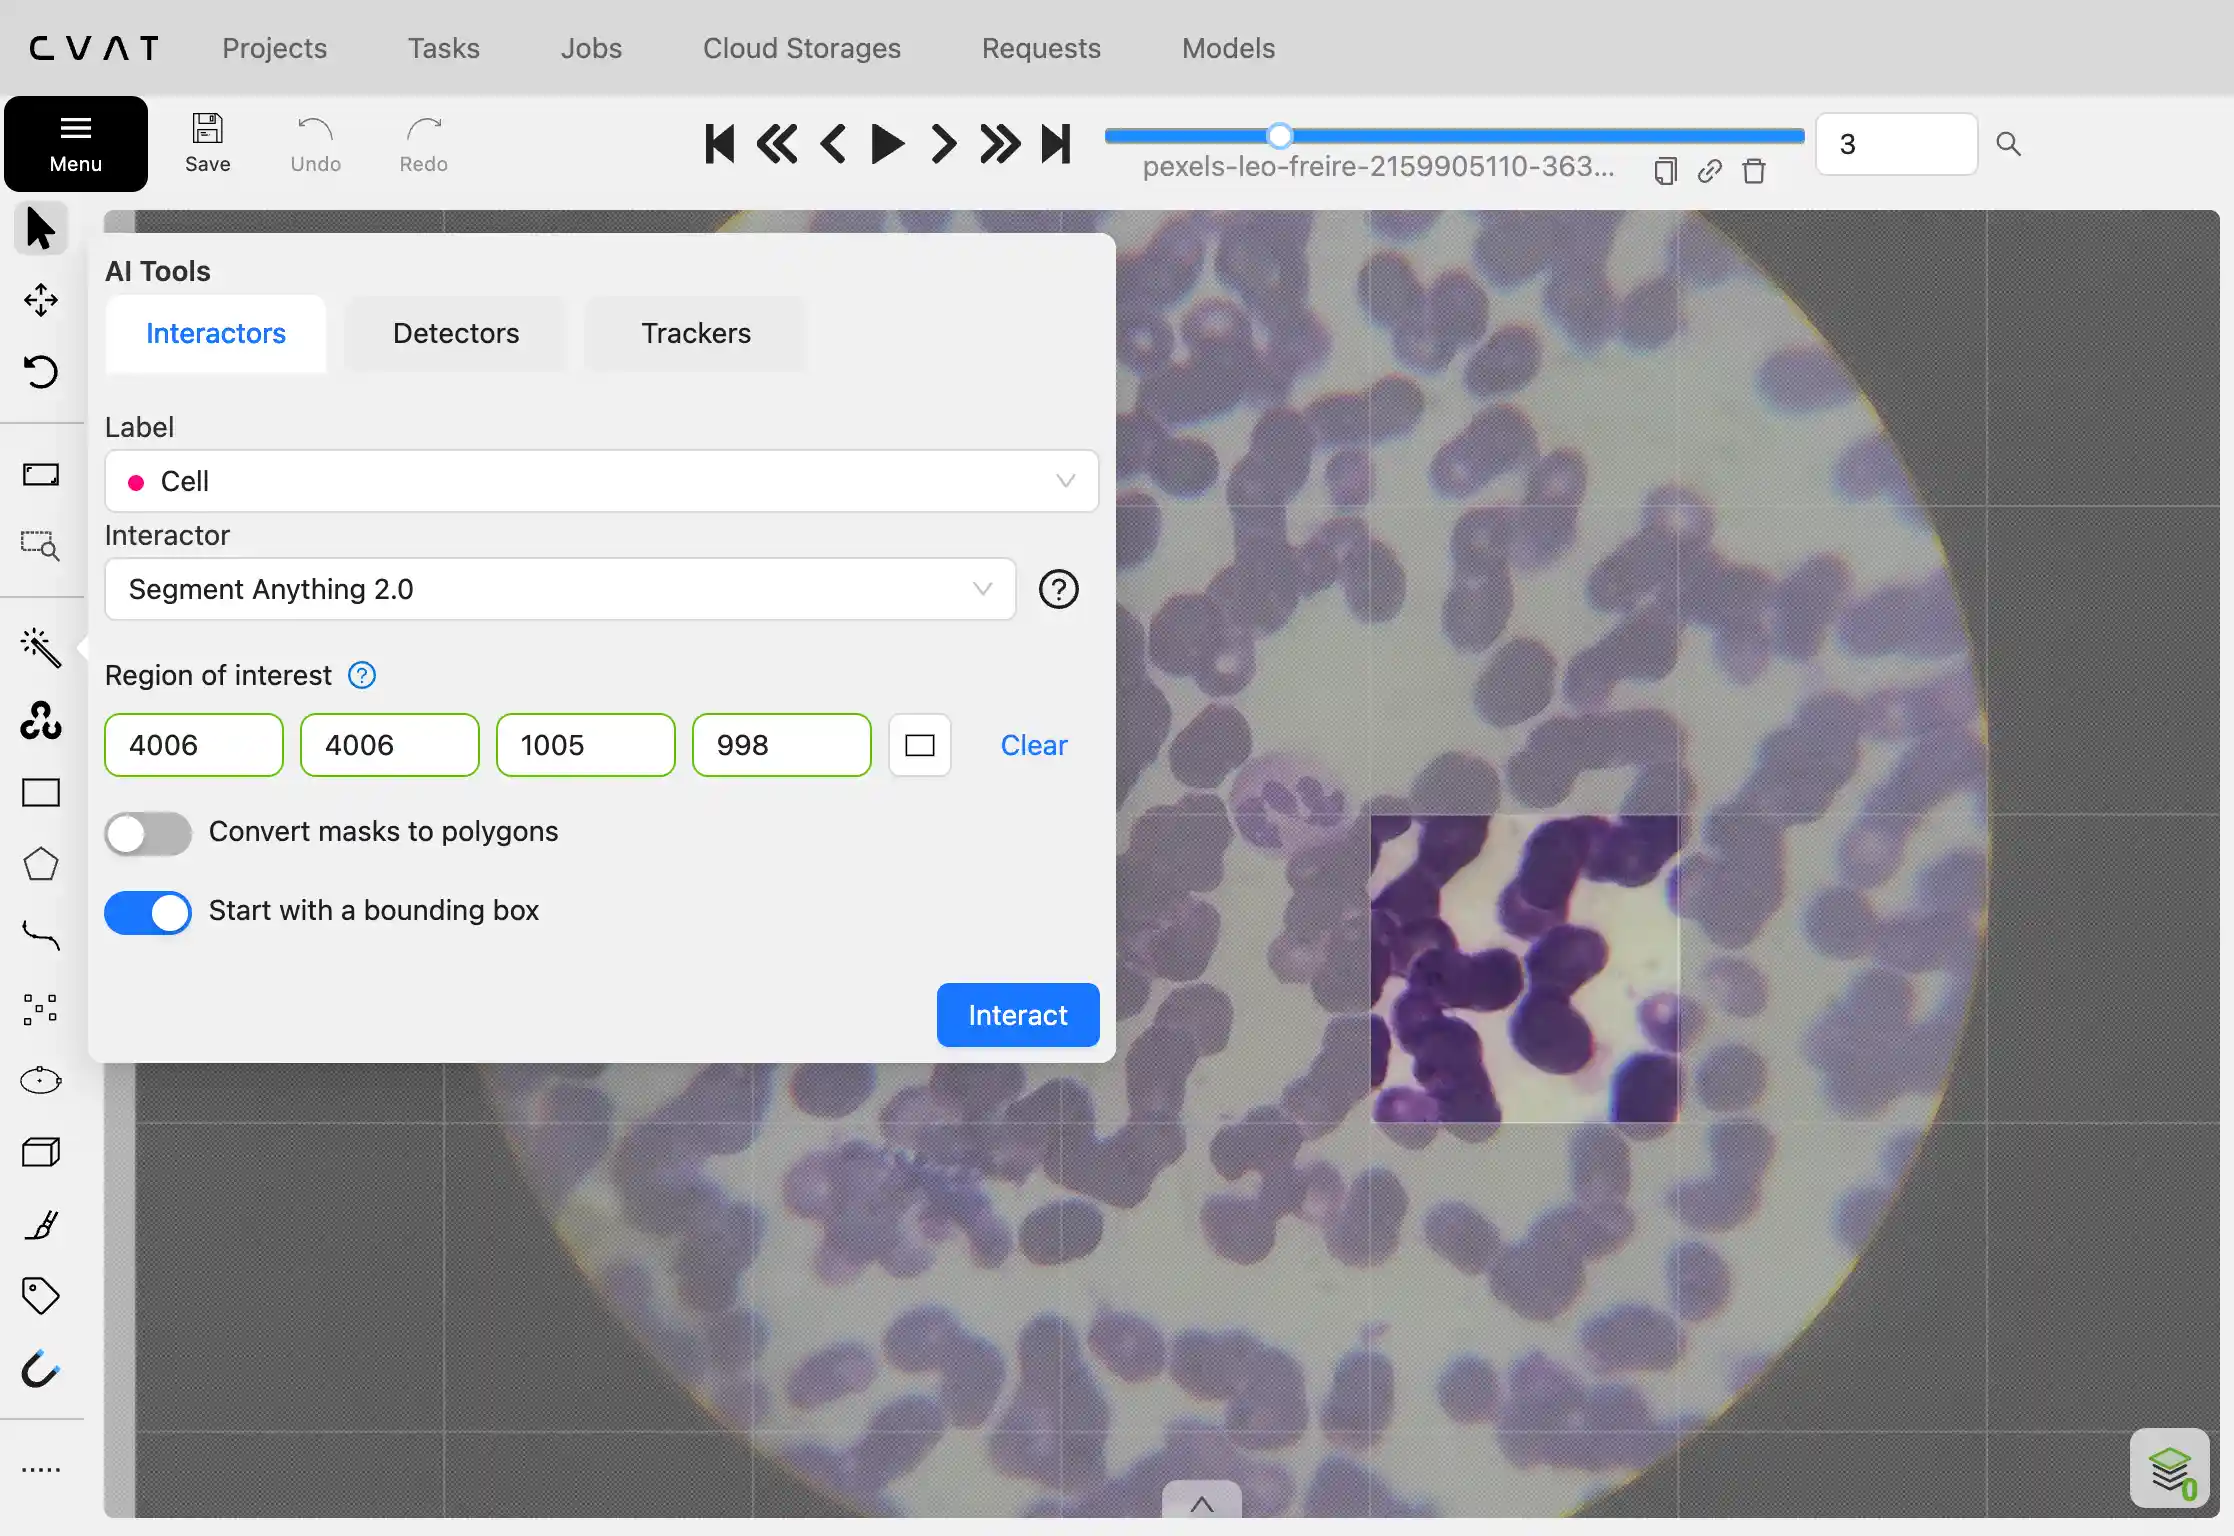
#1 When your image contains many small, similar objects
For example, if you are labeling seeds, cells, particles, small products, or other repeated objects, running a model on the full image may produce incomplete or merged results. With ROI, you can process the image in smaller sections and review the output region by region.
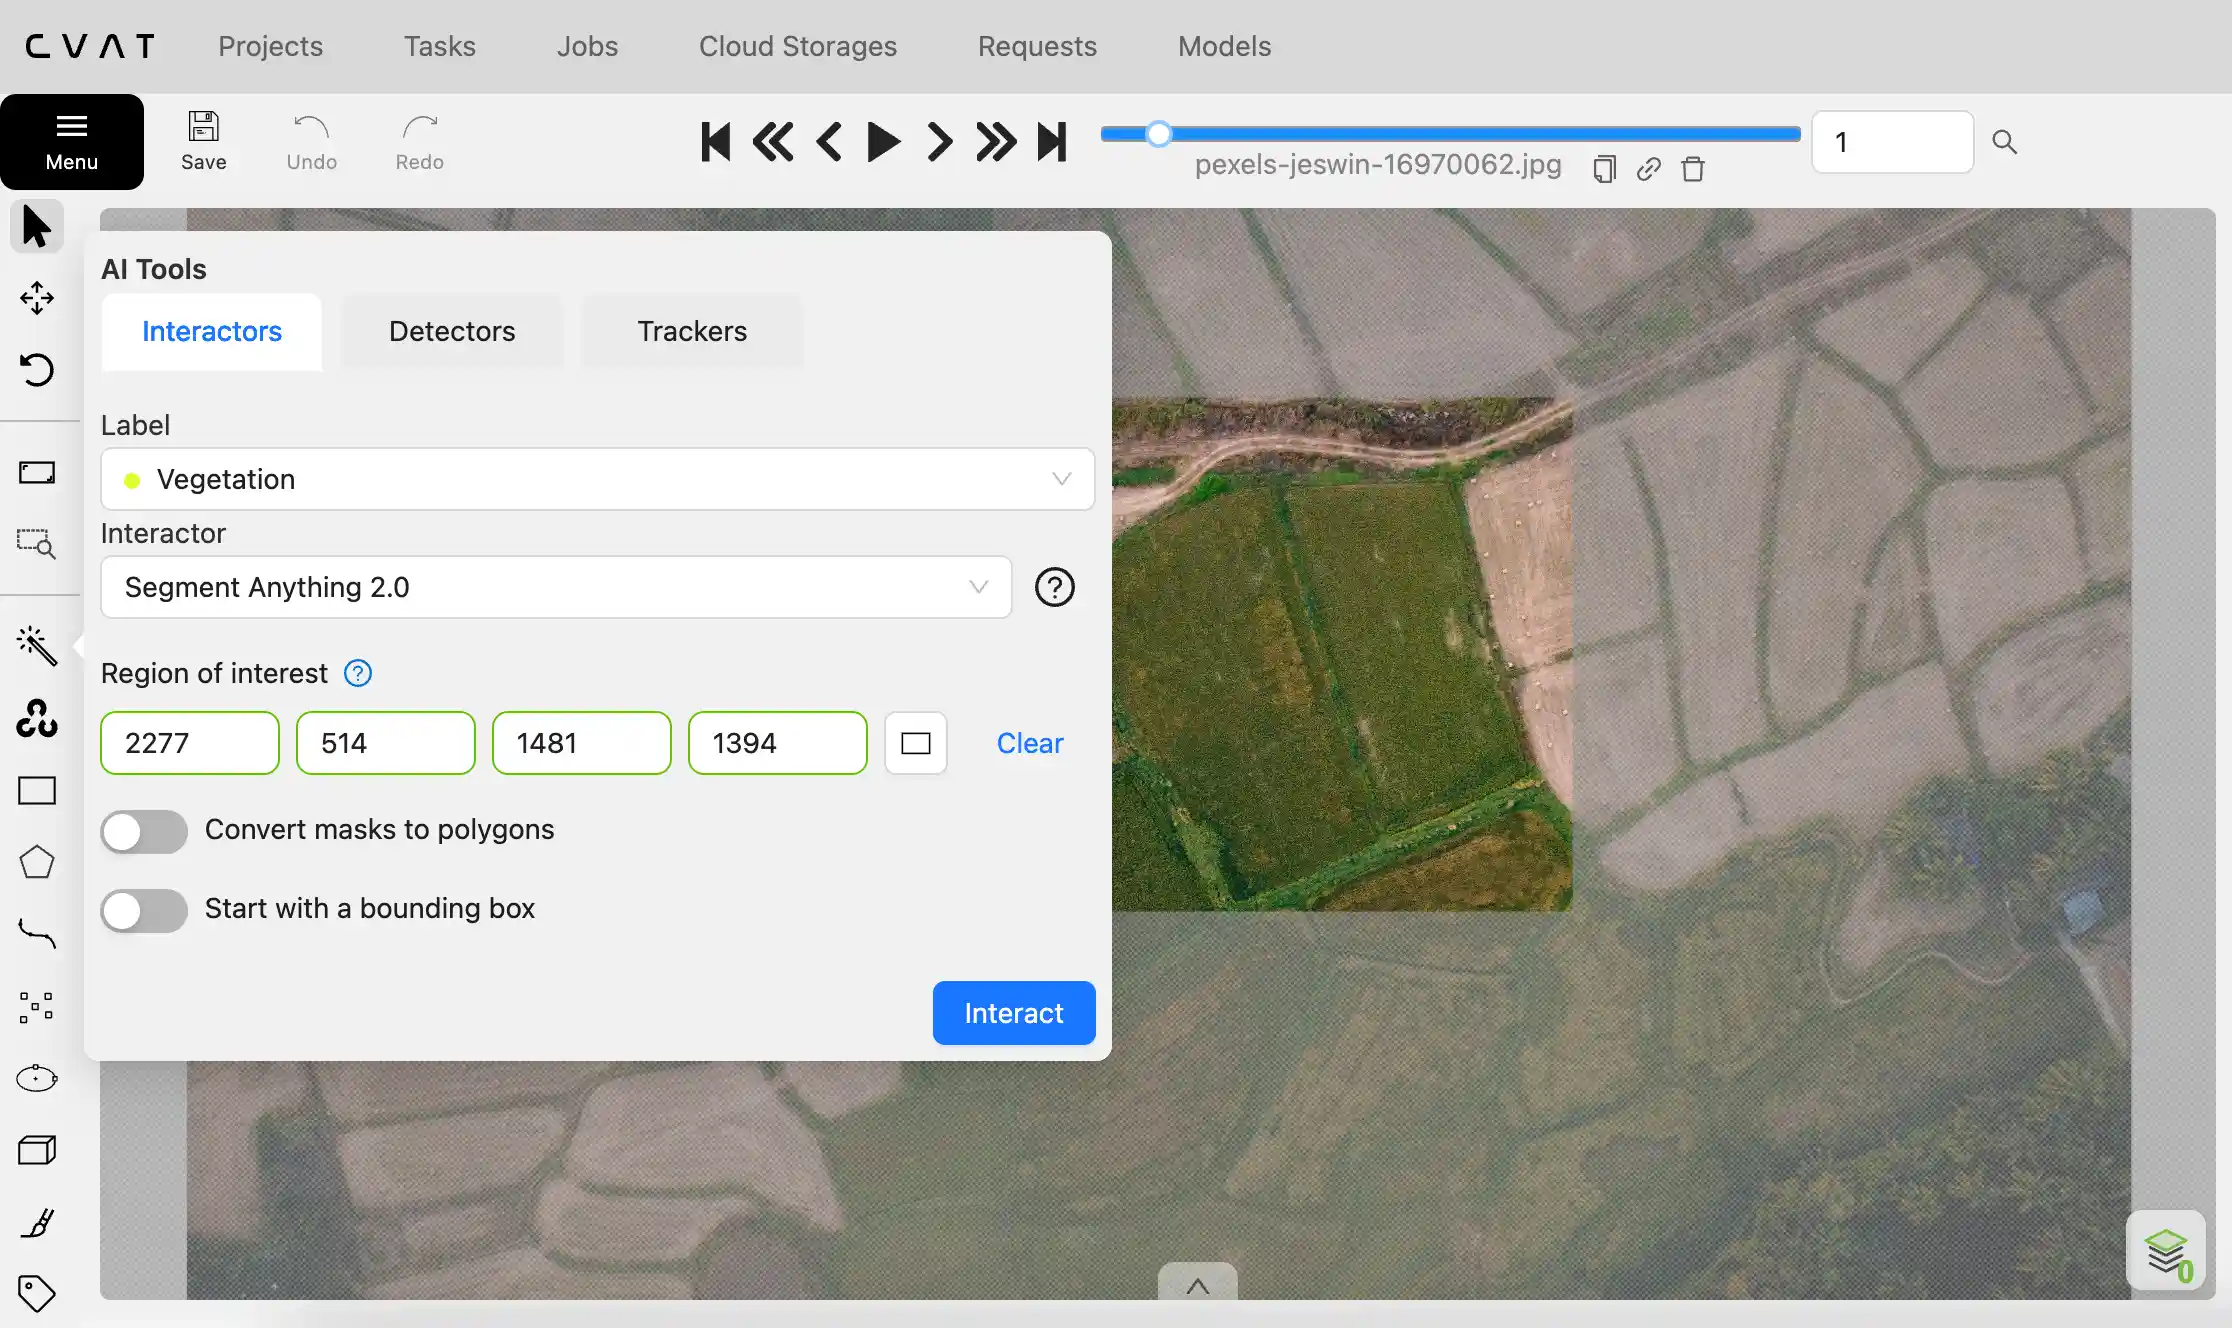
#2 When only part of the image is relevant
For example, if you only need to label objects in the center of a fisheye camera image, inside a specific window, or within a fixed monitored area, ROI helps you avoid processing the full image and deleting extra annotations afterward.
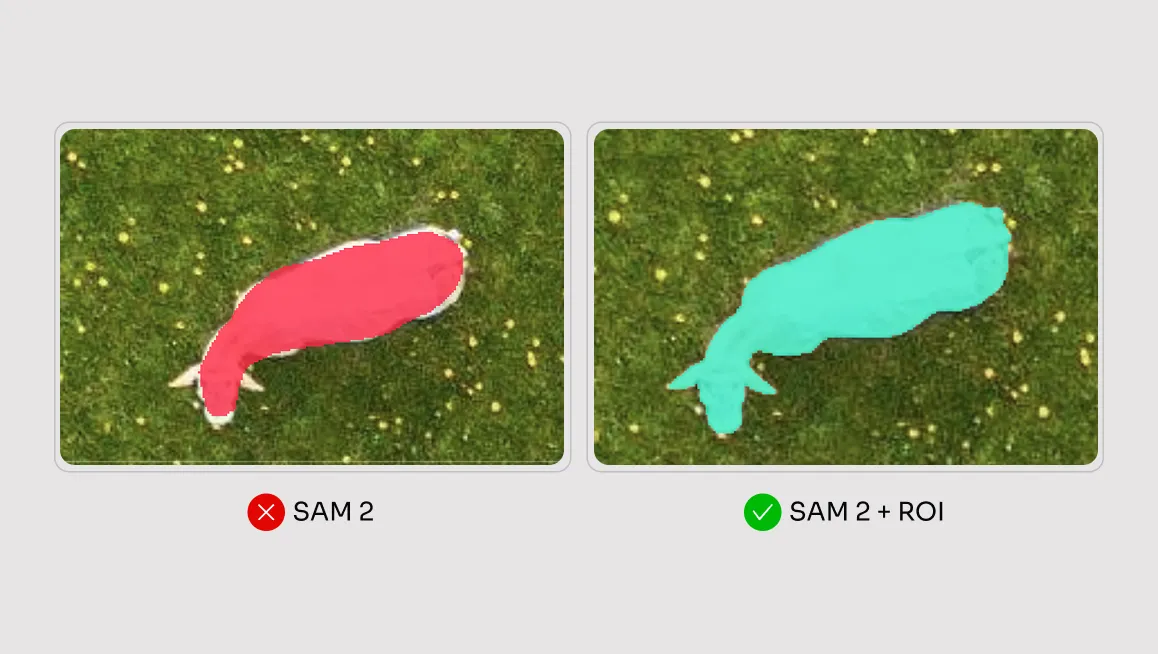
#3 When high-resolution images lose detail during model inference
If small objects are missed when the model runs on the full image, try selecting a smaller region and running automatic annotation there. This can help reduce the impact of image downscaling and make small objects easier for the model to process.
#4 When you want to reduce cleanup after auto-labeling
Instead of generating labels across the entire image and removing unnecessary results, select the area you actually want to annotate before running the model.
Using ROI for task-level automatic annotation
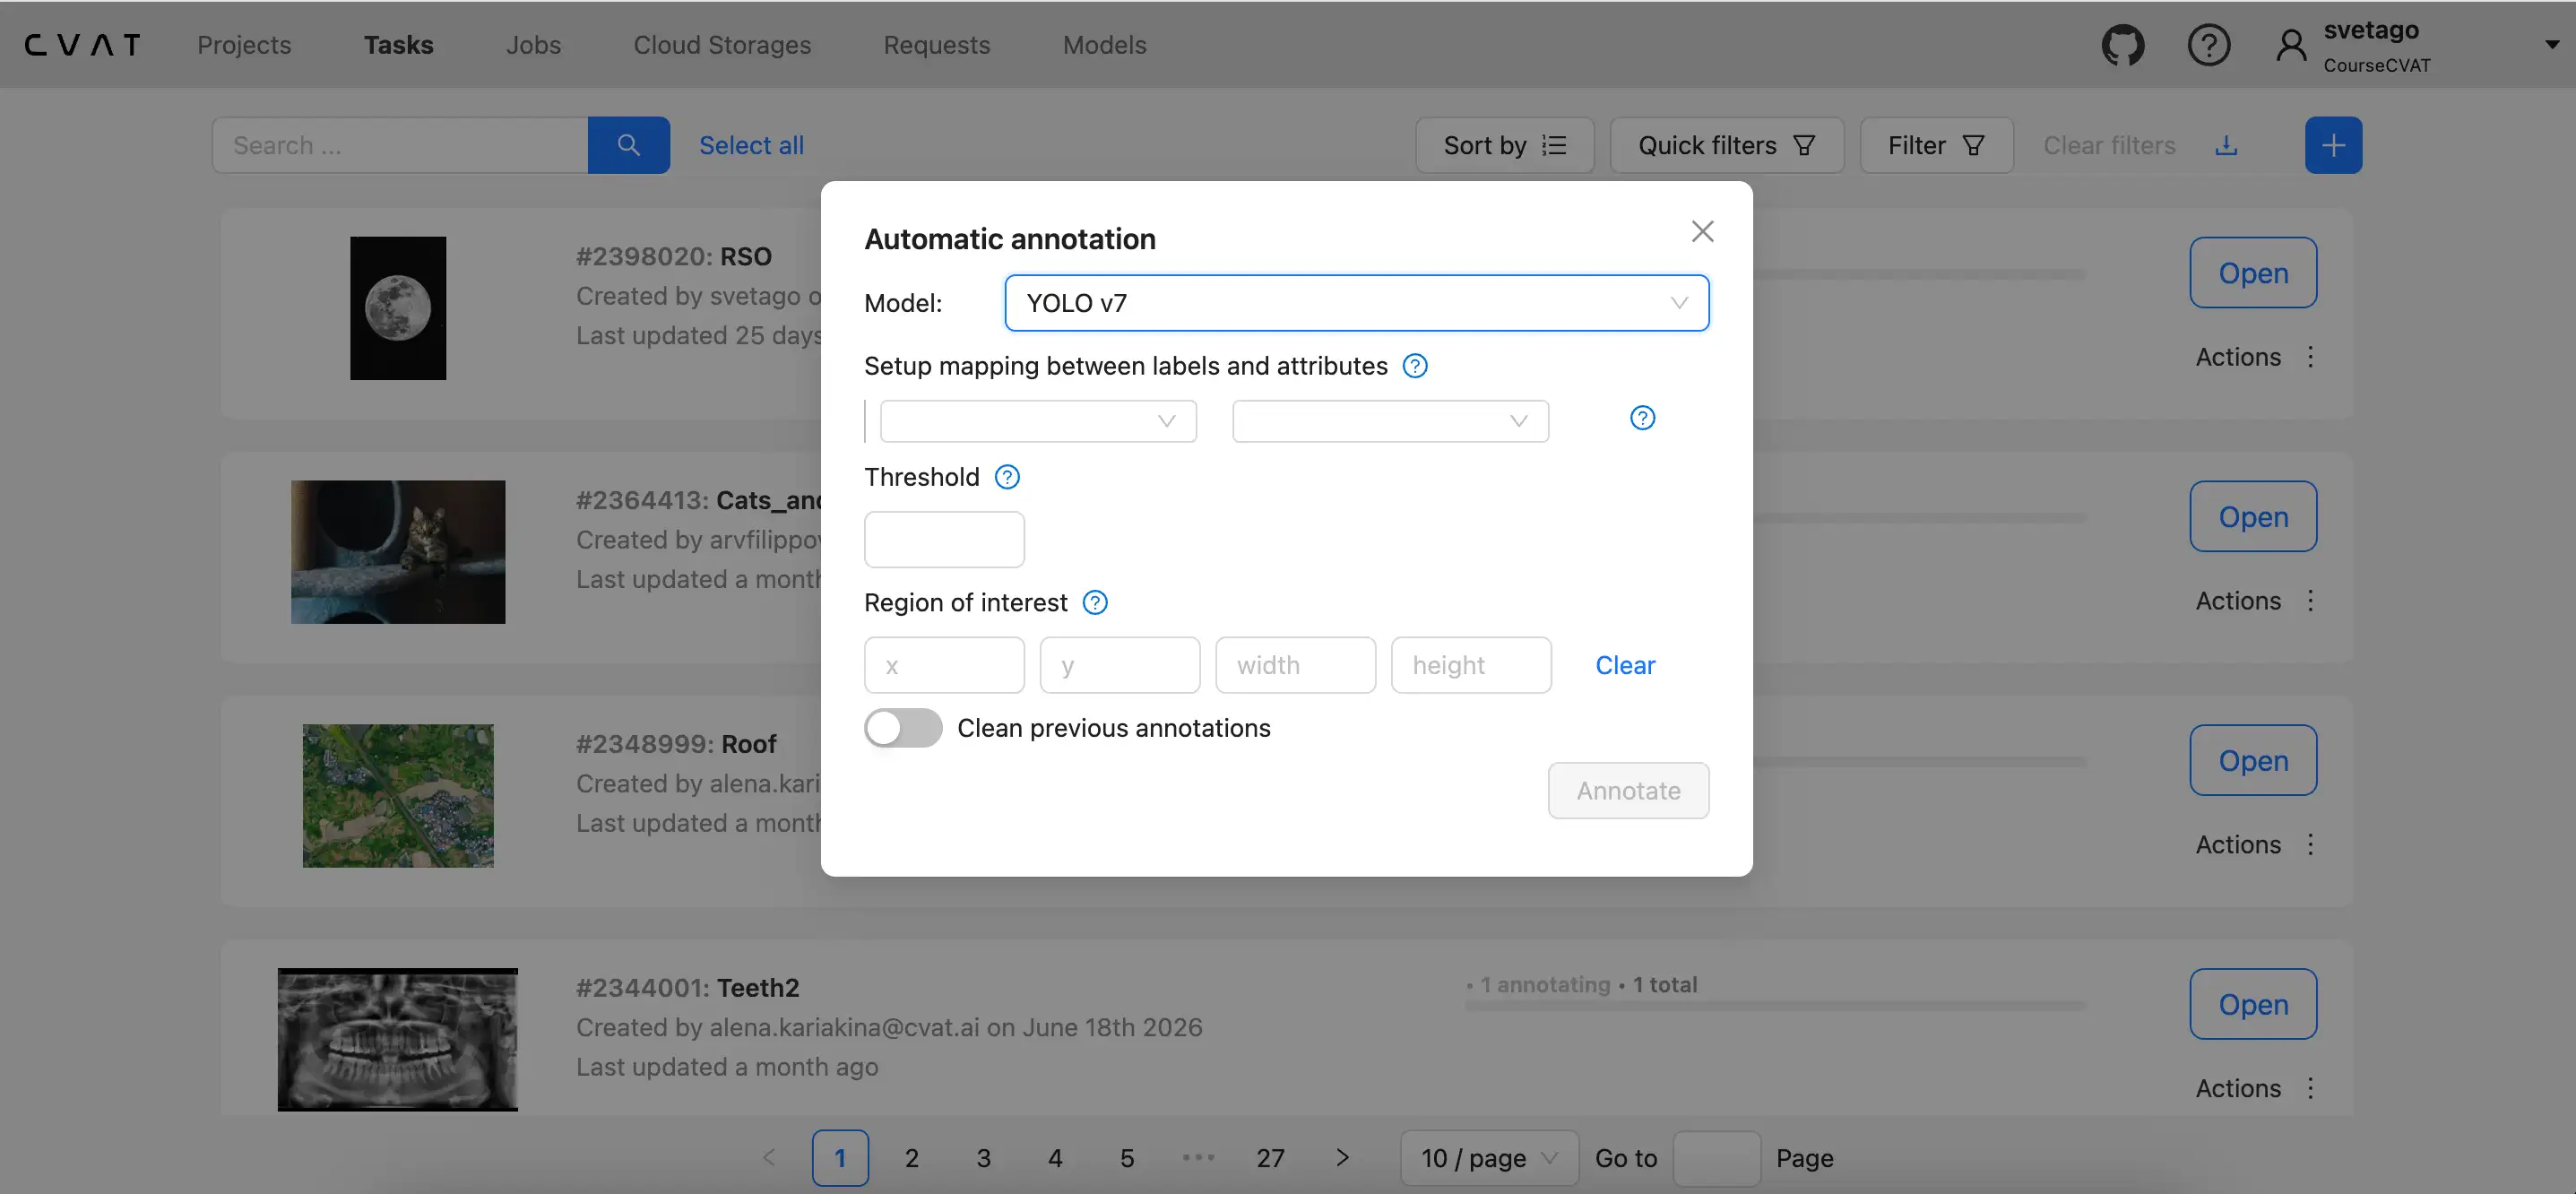
Region of Interest is available in the automatic annotation flow for individual jobs through AI Tools and for entire tasks through Automatic annotation action from the Task page.
To use ROI for an entire task, open the task, go to the “Automatic annotation” section, select a model, and enter the coordinates for the region you want to annotate. CVAT will apply the model only within that selected area.
For task-level annotation, ROI works when all images in the task have the same resolution and the area needed to be labeled remains the same. If the task contains images with different resolutions, the same region coordinates may not fit every image correctly.
Try Region of Interest in CVAT today
Region of Interest gives you a more precise way to use automatic annotation in complex images. Select only the part of the frame that matters, run models on smaller regions, and reduce the time spent cleaning up labels you did not need.
For more information about using ROI with detectors and interactors, read the docs.
Try Region of Interest in CVAT Online, Enterprise, or Community edition, and let us know what you think.


.svg)
.png)

.png)




.png)