


One of the most frequently used annotation tools in CVAT is the Brush tool. This tool combines the capabilities of brush and polygon annotations, providing flexibility in creating masks for objects of any complexity.
What is the Brush Tool in CVAT?
The Brush tool in CVAT allows you to draw masks manually using the cursor as a brush or create them based on polygons. When using polygons, we mark the outer contours of the object, and this area is then transformed into a mask. This makes the tool especially useful for tasks that require high precision and detailing, including complex or irregular object shapes.
Brush Tool (Mask) vs. Polygons: What’s the Difference?
Masks and polygons in CVAT have different approaches to annotating objects:
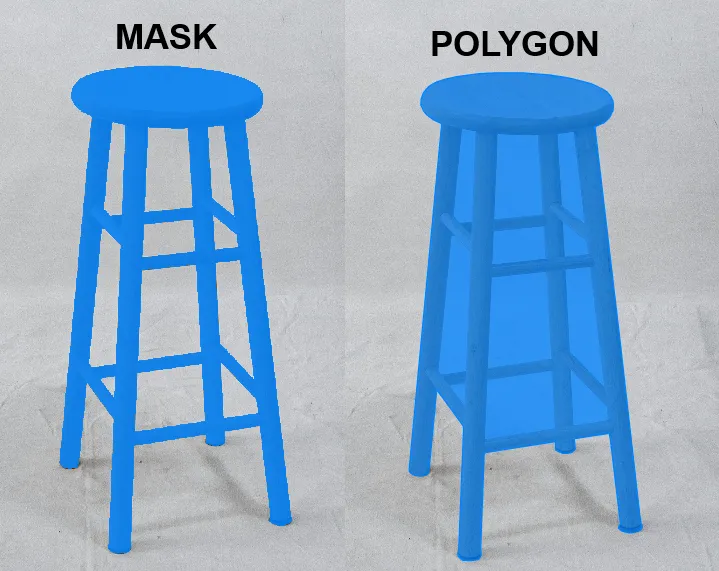
- Masks allow you to highlight both the outer contours and internal areas of objects. Using the Brush tool, complex shapes can be annotated, including holes and details inside objects.
- Polygons, on the other hand, are limited to annotating only the outer contour of the object. CVAT does not allow cutting internal areas or creating holes within polygons.
This key difference makes masks more versatile in tasks that require detailed work.
Advantages and Disadvantages of the Brush Tool
Advantages of the Brush Tool:
- Flexibility: Allows the creation of masks of any shape, including complex contours and internal holes.
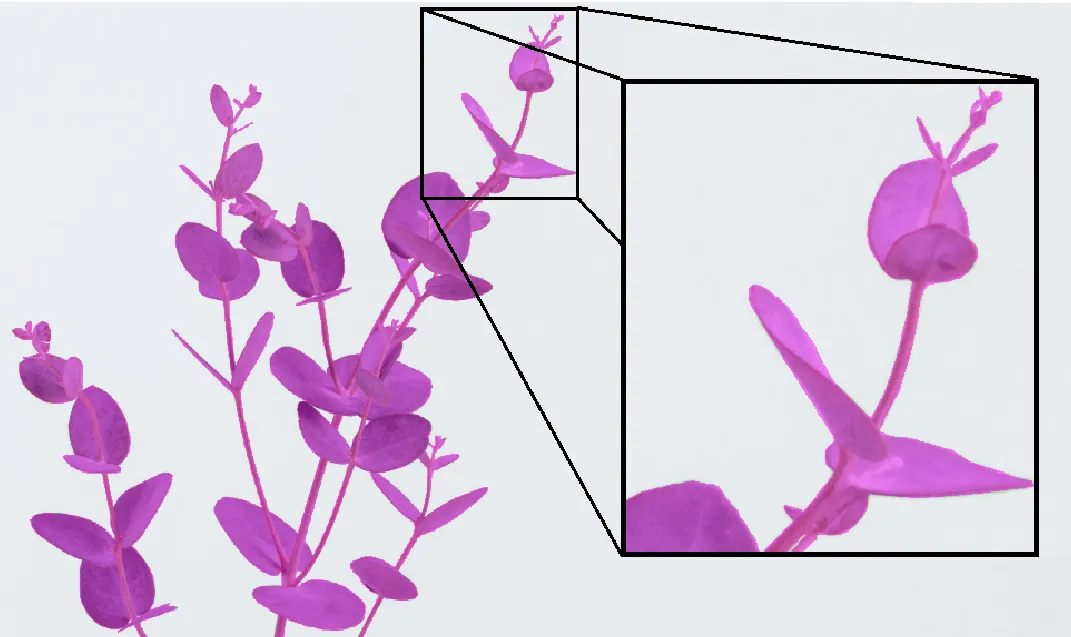
- High precision and detailing: The Brush tool lets you work with minute details, including hair and other small elements.
Disadvantages of the Brush Tool:
- Labor-intensive: Working with the Brush tool can take a long time, especially for large objects or complex scenes.
- Skill requirement: Annotators need more experience and attention to detail to work effectively with the Brush tool compared to using a simple polygon.
- Editing difficulties: Correcting masks can be a labor-intensive process, especially when significant revisions are needed.
Main Tasks of the Brush Tool in CVAT
Masks are a versatile tool for tasks that require high accuracy and detailed object selection. Here are the main examples where masks are applied:
- Object Segmentation in Images
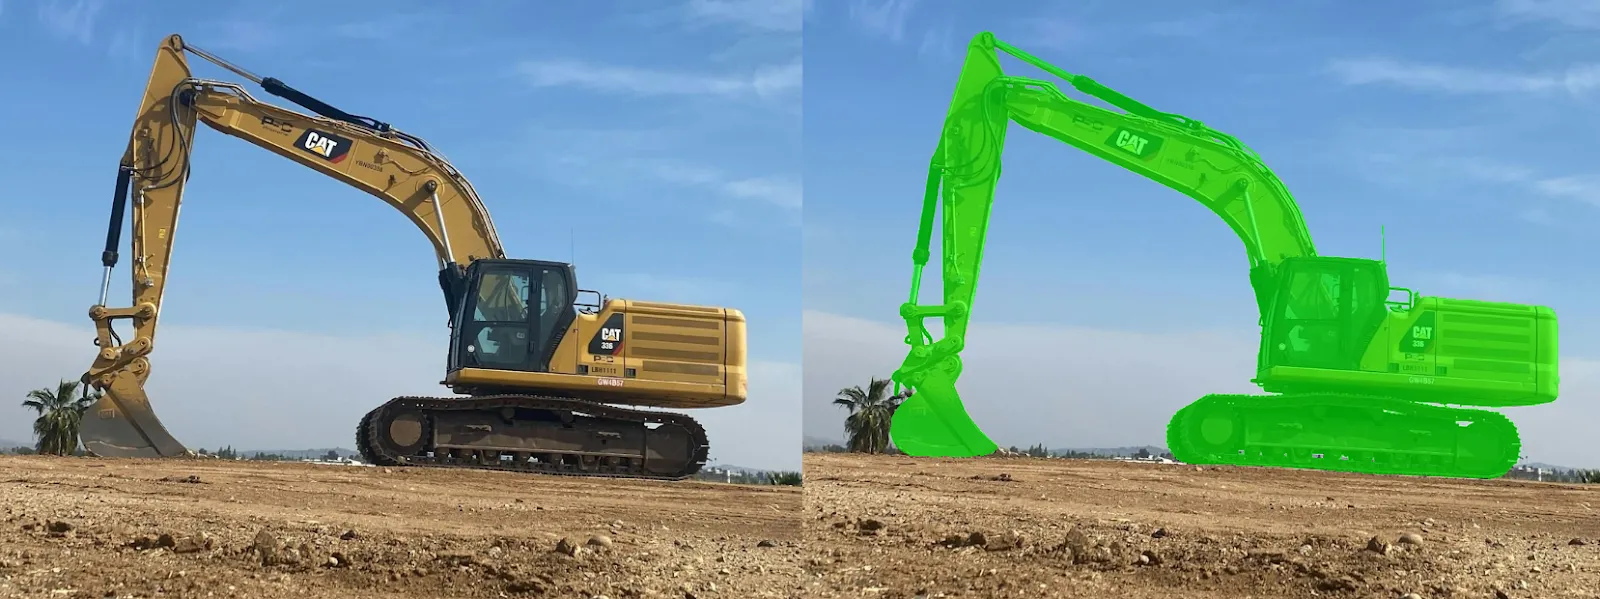
Masks are widely used in instance segmentation and semantic segmentation tasks for pixel-level object selection. This is crucial in computer vision for identifying complex shapes, such as people, animals, plants.
- Background Removal
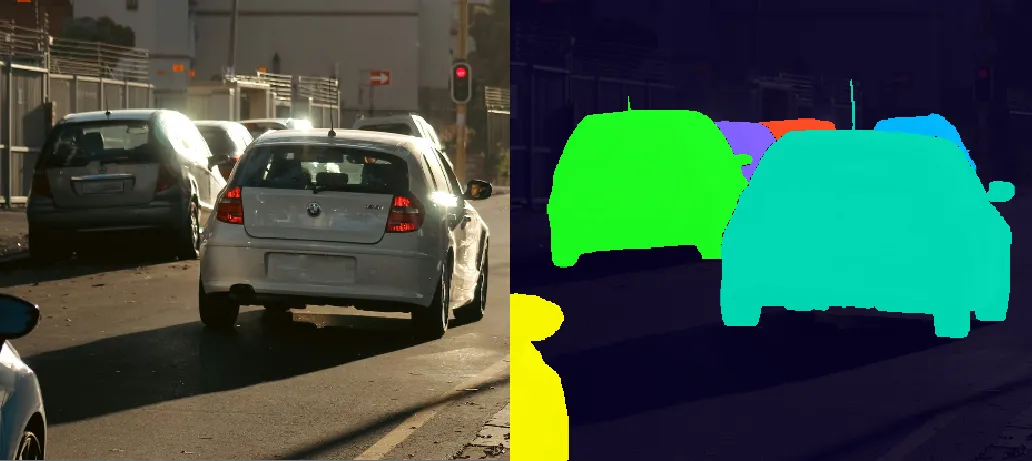
In urban datasets, masks are often used to isolate vehicles from the background, such as roads, buildings, and pedestrians. For example, when annotating images for autonomous driving models, accurately separating cars, buses, and bicycles from their surroundings ensures the model focuses on the features of the vehicles themselves, improving object detection and recognition performance.
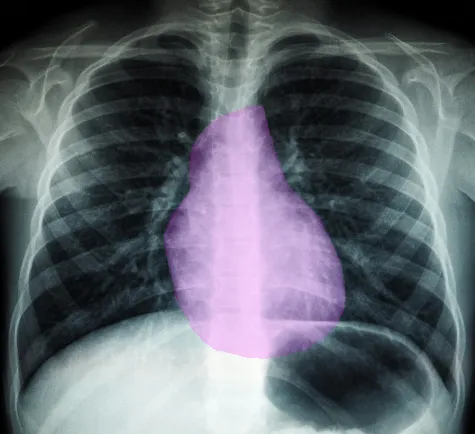
- Medical Segmentation
In medical imaging, masks are used to highlight organs, tissues, and pathologies (such as tumors) in CT, MRI, and X-ray images, aiding in diagnosis and research.
Examples of Mask Use
Popular datasets for masks and polygons may overlap, but their use depends on the type of tasks the data is intended for. The primary difference lies in the annotation format and the level of detail required for a specific case.
- COCO (Common Objects in Context)
Supports instance segmentation, providing masks for objects. Masks are important for tasks that require high-precision object segmentation.
Example use: training Mask R-CNN. - Cityscapes
Contains masks for semantic and instance segmentation of urban infrastructure. Provides high-detail scenes, useful for autonomous driving.
Example use: segmentation of roads, pedestrians, buildings. - Pascal VOC
Masks for semantic segmentation, though less complex than those in COCO.
Example use: basic object segmentation tasks.
Conclusion
The Brush tool in CVAT is a powerful tool that provides unique capabilities for annotating objects of any complexity. Although working with this tool may require more time and skill, its versatility makes it indispensable in tasks that require detailed annotations and mask work.


.jpg)
.svg)
.png)

.png)


