


Introduction
High-quality data annotation is essential for training reliable machine learning models. Even small mistakes in annotations can negatively affect model performance, especially in large datasets. In practice, annotators may misinterpret instructions, miss objects, or work inconsistently. As projects grow, manually reviewing every annotation becomes difficult and time-consuming.
To solve this, CVAT includes built-in Quality Control tools. These tools help identify errors early, maintain consistent annotation quality, and ensure that only reliable data is used in production. In this lecture, we will explore how quality control works in CVAT, focusing on Ground Truth, Honeypots, and key quality assessment settings, as well as best practices for validation and metric interpretation.
Manual Validation
While automatic validation helps scale quality control and detect errors early, manual validation is still widely used, especially when tasks are complex or labeling rules require human judgment.
In practice, manual validation usually follows one of these approaches:
- Full review (100%): every annotation is checked by a reviewer before it is accepted. This provides the highest level of quality assurance, but is time-consuming and costly.
- Sampling-based review: only a subset of annotations is reviewed (for example, a percentage of jobs or selected frames). This approach is faster and more scalable, but does not guarantee full dataset quality.
- Cross-validation: annotators review each other’s work in a rotating or cross-assigned manner to reduce bias and improve consistency. It helps share best practices across the team, but requires clear guidelines to keep feedback objective.
These methods are often combined with automatic validation to balance quality, speed, and cost.
Automatic validation methods
Ground Truth (GT)
Ground Truth (GT) is the most universal method of automatic annotation verification in CVAT. It represents a carefully annotated reference dataset that serves as a benchmark for evaluating annotators’ work. GT frames are annotated with maximum accuracy and attention to detail and are then used to compare regular annotations against this “gold standard.”
GT can be created at any stage of the annotation workflow and does not interrupt ongoing annotation jobs. Automatic verification using Ground Truth currently supports all 2D annotation types except 2D cuboids.
Creating a Ground Truth Job in CVAT
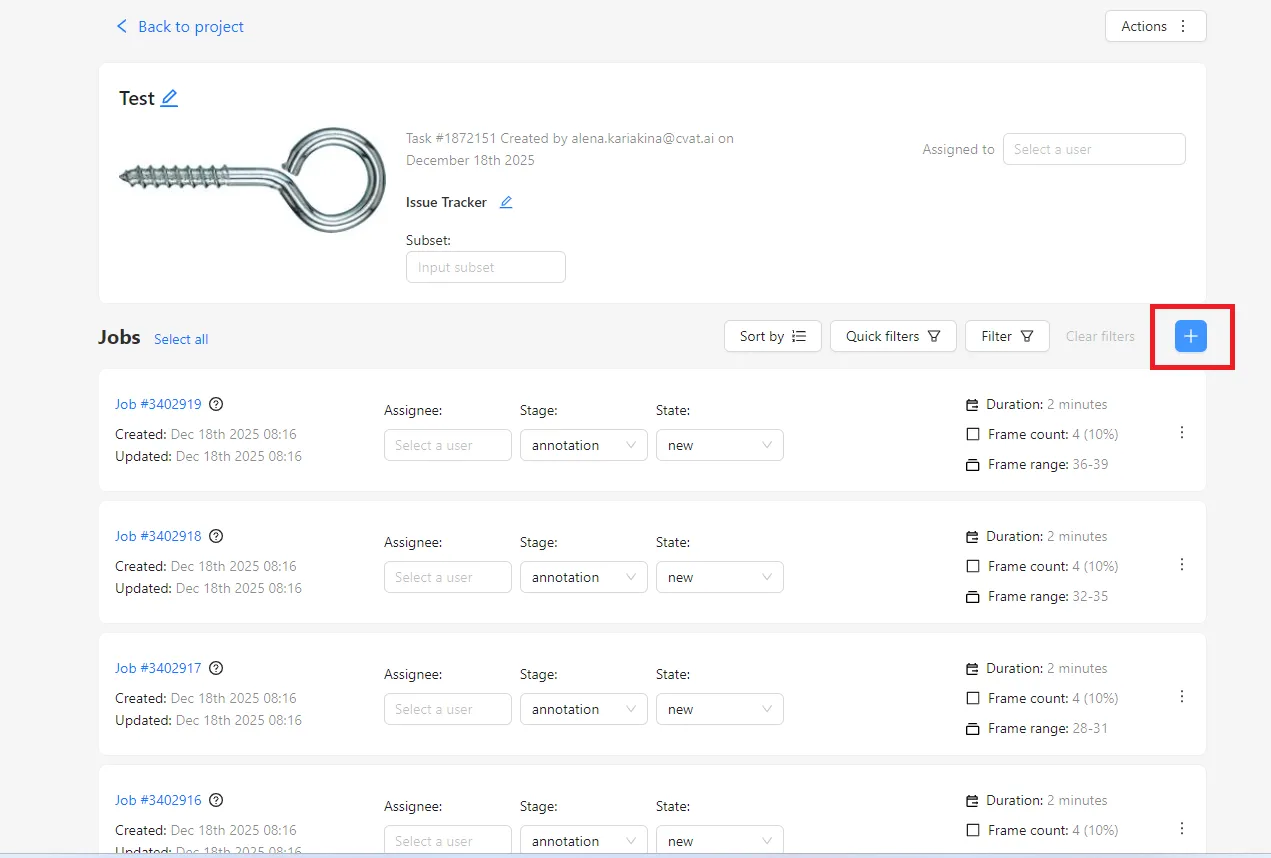
To create a Ground Truth job, you start with an already annotated dataset and click the “+” button in the job creation interface. The Job Type is automatically set to Ground Truth. The key configuration step is selecting the Frame Selection Method.
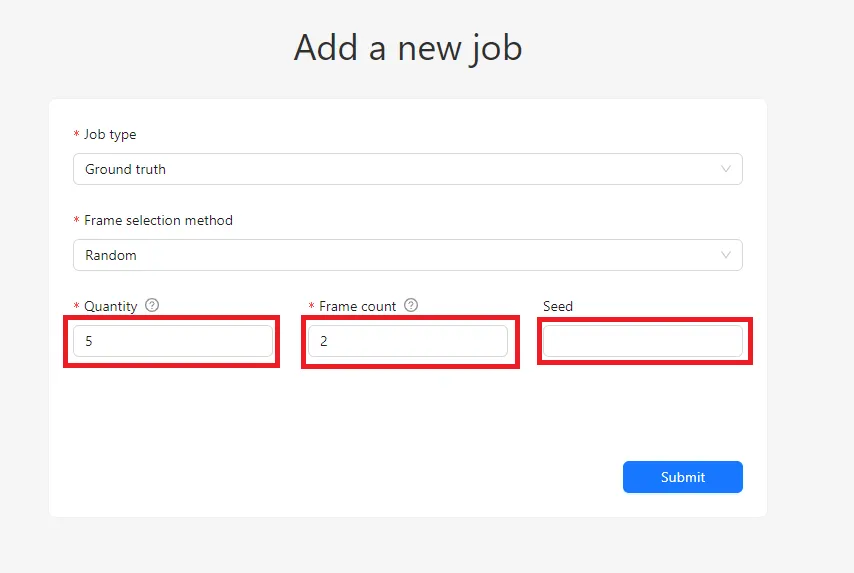
Random Selection
With the Random method, CVAT selects frames randomly from the entire dataset. You can control the size of the validation set in two ways:
- Quantity – a percentage of the dataset
- Frame Count – an exact number of frames
These values are synchronized: changing one automatically updates the other. For reliable validation, it is generally recommended to select between 5% and 15% of frames. Smaller datasets usually require a higher percentage to produce meaningful results.
A useful option here is the Seed value. Using the same seed guarantees the same frame selection in the future, ensuring reproducibility. Leaving it empty produces a new random selection each time.
The main drawback of the Random method is uneven distribution. Some jobs may contain several validation frames, while others may receive none, making it impossible to evaluate quality for those jobs.

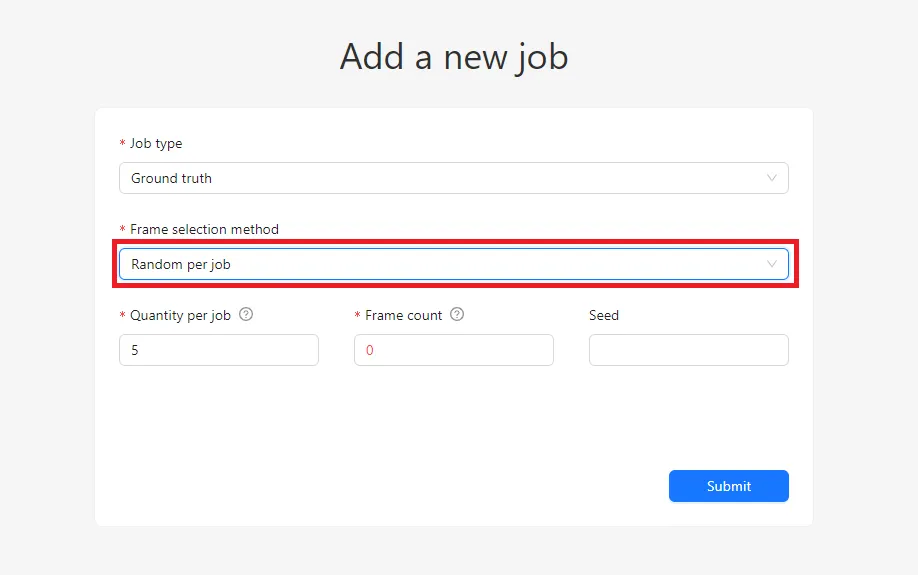
Random per Job Selection
The Random per job method addresses this limitation. Instead of selecting frames across the entire dataset, CVAT selects a fixed percentage of frames within each job.
For example, if each job contains 20 frames and you set the Quantity per job to 10%, each job will receive exactly two Ground Truth frames. This guarantees balanced coverage and ensures that every job can be validated.
Compared to Random selection, Random per job provides more predictable and controlled validation distribution, which is especially useful for structured workflows.
Honeypots
Concept and Motivation
With Ground Truth, the number of validation frames grows linearly with the dataset size. In large projects, this becomes costly because GT frames require more careful and time-consuming annotation.
Honeypots solve this problem by reusing the same validation frames across multiple jobs. A small set of Ground Truth frames is annotated once and then secretly inserted into regular annotation jobs. Annotators are unaware of which frames are validation frames. After completion, the system compares their annotations with the reference and assigns quality scores automatically.
This approach is particularly effective for large-scale projects where scalable quality control is required.
Limitations of Honeypots
Honeypots come with several constraints:
- Supported only for 2D tasks (excluding 2D cuboids)
- Can be configured only during task creation
- Not suitable for tracking tasks or workflows requiring strict frame order
- If the validation pool is too small, annotators may start recognizing validation frames, especially when Immediate Feedback is enabled
Creating a Task with Honeypots
When creating a task, select Honeypots in the Quality section.
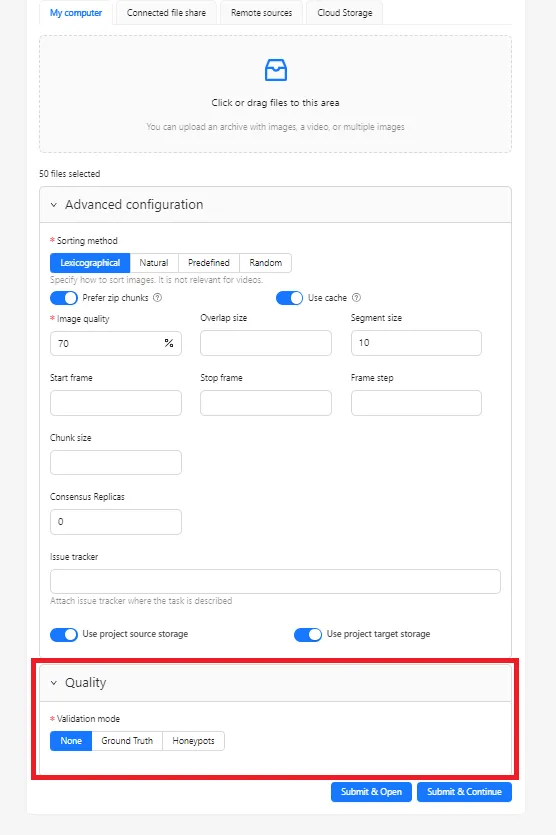
Key parameters include:
- Total honeypots – the size of the overall validation set, expressed as a percentage of the dataset
- Overhead per job – the number of honeypot frames added to each job, relative to job size
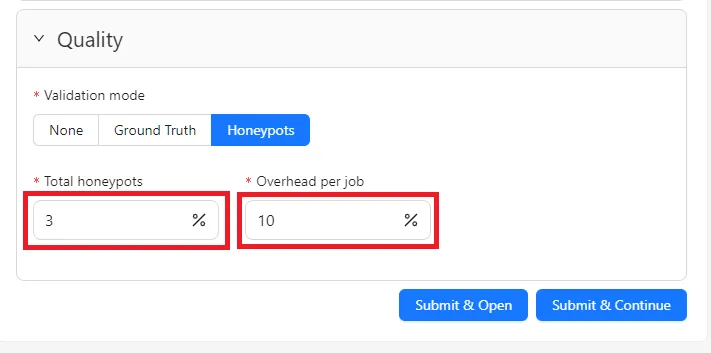
For example, with 100 frames split into jobs of 20 frames:
- Setting Total honeypots to 3% creates a validation set of 3 frames
- Setting Overhead per job to 10% inserts 2 honeypot frames into each job
Unlike standard Ground Truth jobs, the GT job created for Honeypots cannot be deleted. However, individual frames can be removed from the validation set if needed.
Frame Distribution and Usage
In Honeypots mode, validation frames are inserted into jobs as additional frames. These frames are ignored during annotation export and are used only for quality evaluation. As a result, job sizes may differ slightly.
You can expand the validation pool by increasing the Total honeypots value. A larger validation set allows each job to receive unique honeypot frames, improving the reliability and diversity of quality checks.
CVAT also provides statistics on frame usage, allowing you to see how many times each validation frame has been used across jobs.
Choosing the Right Validation Set Size
The reliability of quality metrics depends not on the number of validation images, but on the total number of annotations within those images.
If each image contains only one object, quality estimates become coarse and unreliable. In contrast, images with many annotated objects provide more data points and more stable metrics.
As a general guideline:
- Focus on the total number of validation annotations, not just images
- Aim for roughly twice the minimum number of annotations needed to measure the desired quality level
For example, to verify an accuracy of around 80%, approximately 20 validation annotations are recommended.
The goal is to balance reliability with efficiency: the validation set should be large enough to produce trustworthy results without unnecessarily increasing annotation cost.
Quality Assessment Settings
Quality assessment settings define how CVAT compares annotator work with Ground Truth.
General Settings
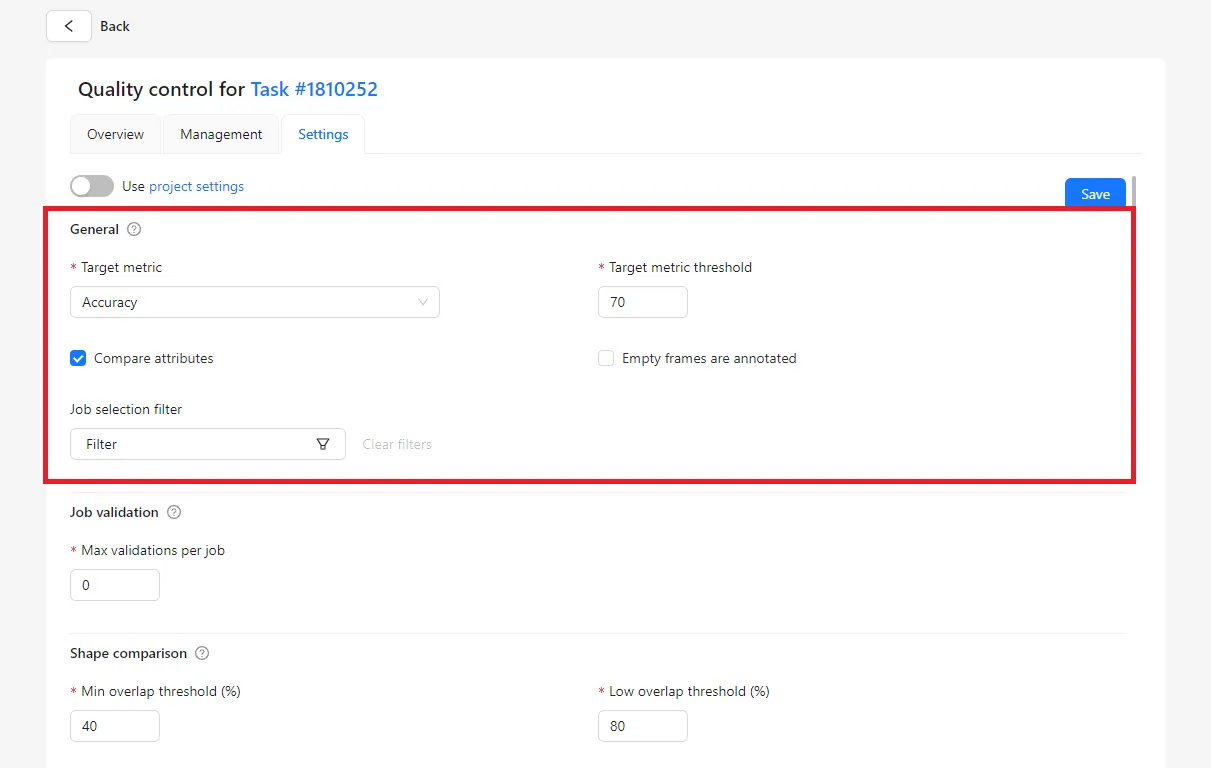
Tasks can inherit quality metrics from the project or use custom settings. The Target metric determines how quality is calculated:
- Accuracy – overall correctness, including missed and extra objects
- Precision – correctness of annotated objects
- Recall – completeness of annotations
These metrics are based on:
- True Positives (TP)
- False Positives (FP)
- False Negatives (FN)
The Target metric threshold sets the minimum acceptable score and is used for Immediate Feedback.
Empty Frames Handling
The Empty frames are annotated option controls whether frames without objects are included in metric calculations. Enabling it produces stricter and more realistic metrics, while disabling it can inflate scores by ignoring empty frames.
Job Selection and Validation Limits
Filters allow you to specify which jobs are included in quality calculations. The Max validations per job parameter limits how many correction attempts an annotator can make.
Shape, Keypoint, Line, and Group Comparison
When evaluating annotations, it is important to check not only whether an object is annotated, but also how accurately it is annotated. CVAT uses several comparison methods, each designed for a specific type of annotation. These methods allow the system to assess accuracy, consistency, and correctness in a clear and reliable way.
Shape Comparison
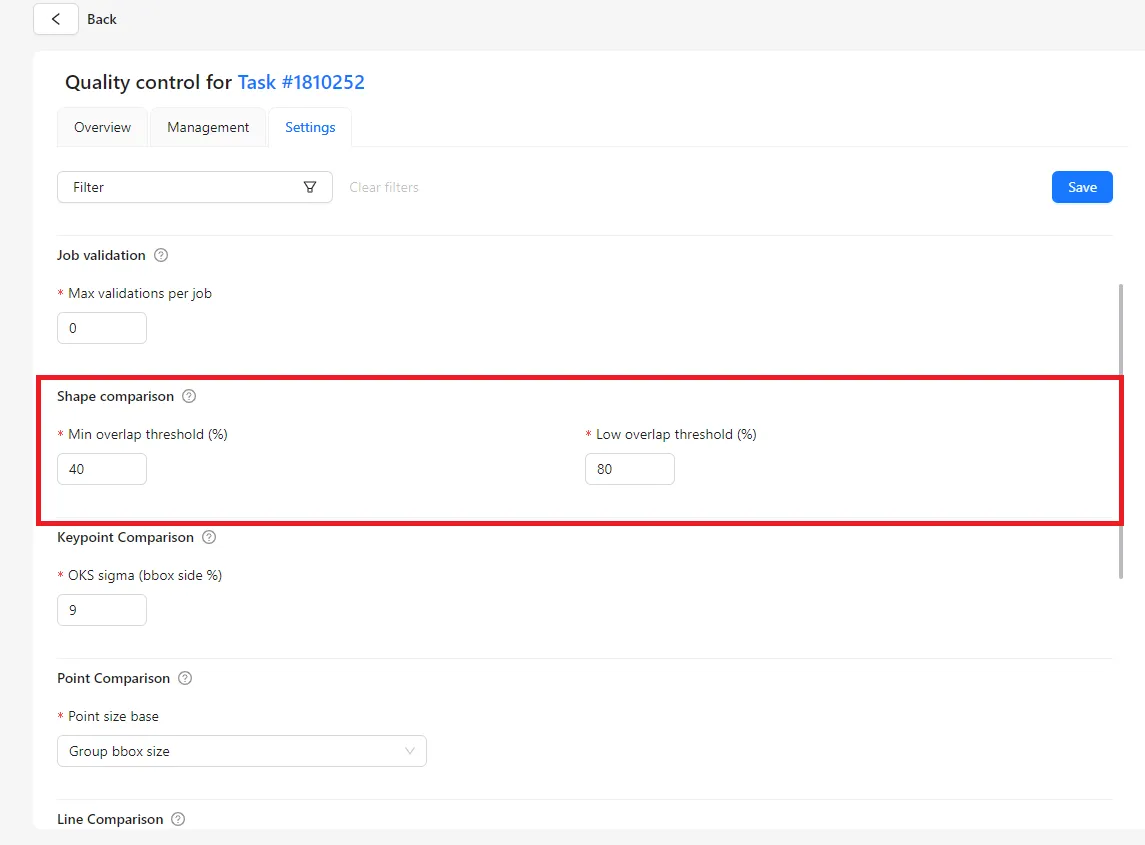
Shape Comparison is used for bounding boxes, polygons, and masks.
The system compares the annotated shape with the reference shape from the Ground Truth and checks how much they overlap. If the overlap is large, the annotation is considered accurate. If the overlap is small, the annotation is treated as incorrect.
Two thresholds control this process:
- Minimum overlap threshold
This defines the lowest acceptable overlap. If the annotated shape overlaps the reference shape less than this value, the annotation is considered wrong. - Low overlap threshold
This defines a higher level of overlap. If the overlap is above the minimum threshold but below this level, the annotation is accepted but marked with a warning, indicating that the shape could be more precise.
This approach helps distinguish between completely incorrect annotations and those that are mostly correct but need improvement.
Keypoint Comparison
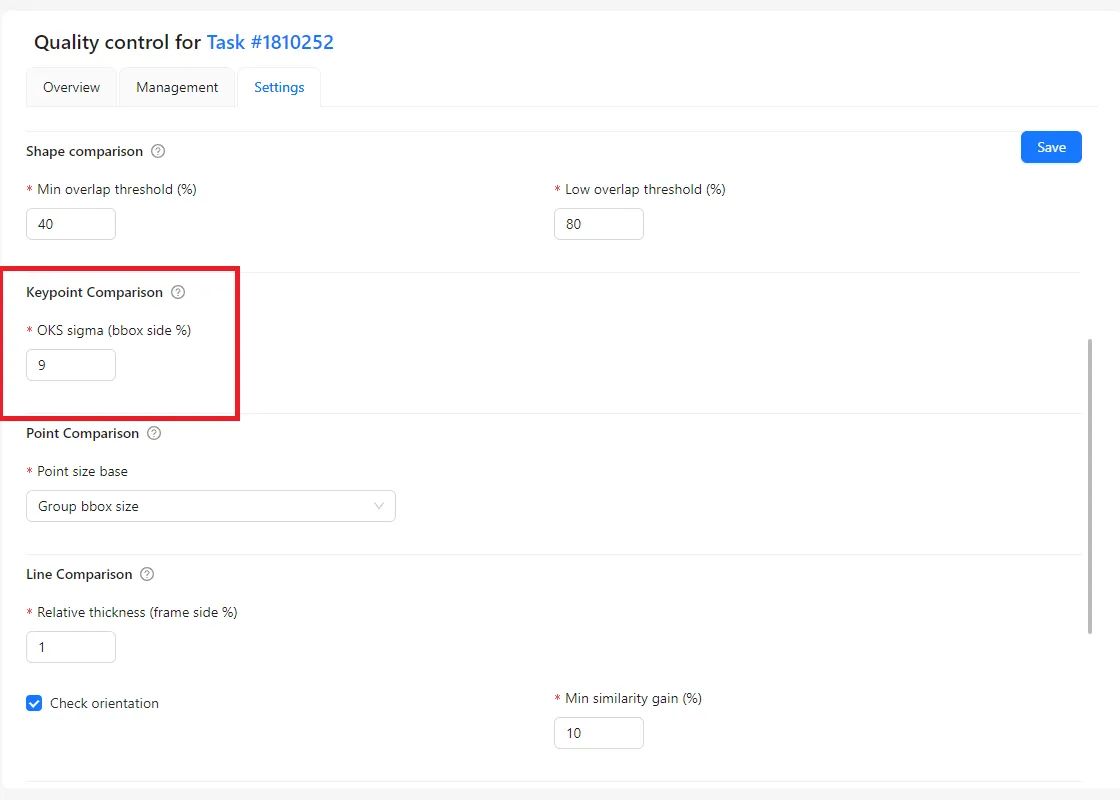
Keypoint Comparison is used for point-based annotations, such as landmarks or skeleton joints.
The system checks how far each annotated point is from the reference point. An acceptable distance is defined using the OKS sigma parameter.
- A smaller sigma value makes the check stricter and allows very little deviation.
- A larger sigma value allows more tolerance and accepts small inaccuracies.
For groups of keypoints or skeletons, only visible points are evaluated, and the final score is calculated as an average across all points. The acceptable distance is calculated relative to the object size or, in the case of single points, relative to the image size.
This ensures that points are placed close to their correct positions without requiring perfect precision.
Point Comparison (Single Points)
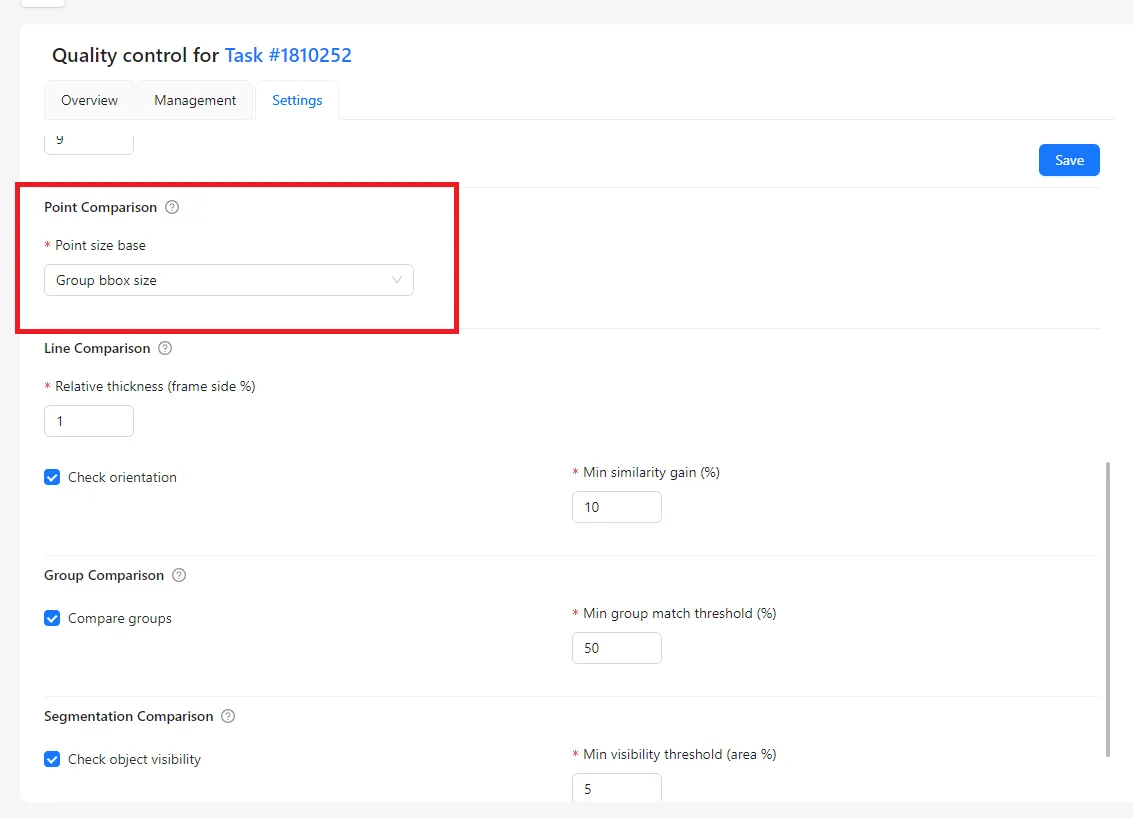
Point Comparison applies to individual points that do not belong to a group or skeleton.
In this case, the matching logic is similar, but the reference size is different. Instead of using a bounding box, the acceptable distance is calculated relative to the image size. This ensures consistent evaluation regardless of where the point appears in the image.
This behavior is controlled by the Point size base setting:
- Group bbox size is used for keypoints and skeletons.
- Image size should be used for single, standalone points.
Line Comparison
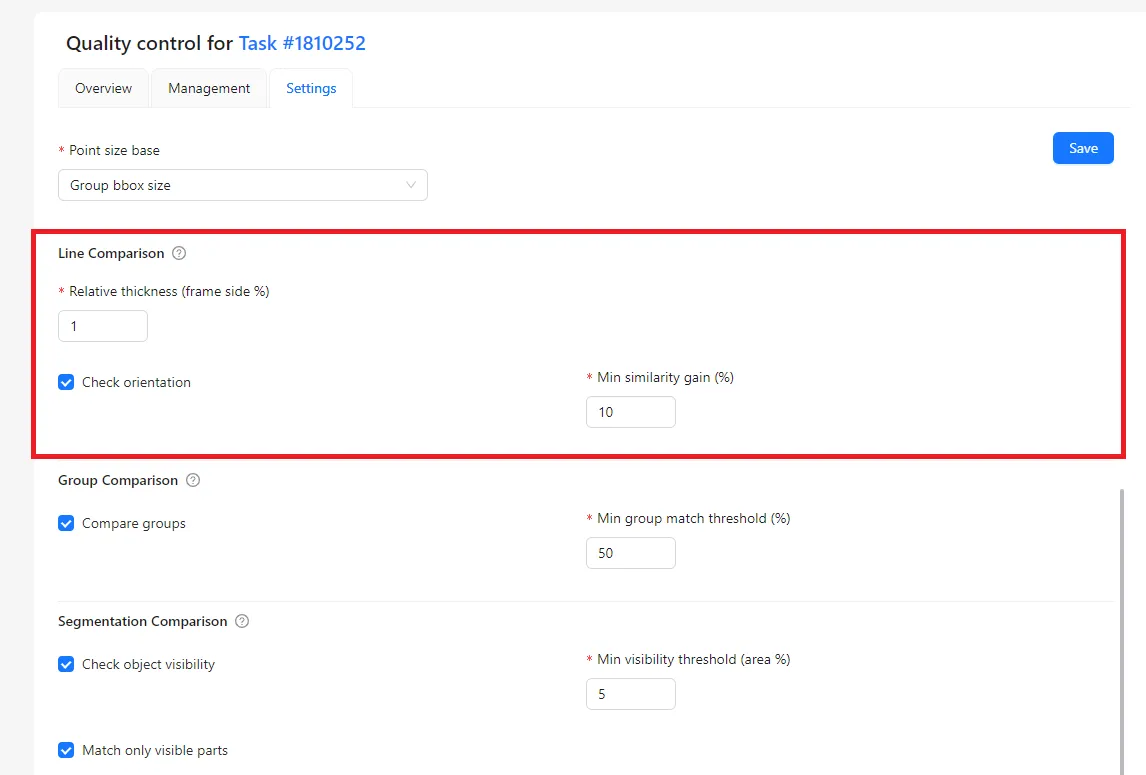
Line Comparison is used for polylines, such as roads or boundaries.
Instead of requiring an exact match, CVAT creates an allowed area, or envelope, around the reference line. If the annotated line stays within this area, it is considered correct. If it goes outside, the annotation is treated as incorrect.
Relative thickness
- Defines how far the annotated line can be from the reference line.
- Controls how strict the line comparison is.
Check orientation
- Checks whether the line direction is correct.
- Shows a warning if the direction does not match.
Min similarity gain
- Defines how much the match must improve after reversing the line.
- Used to detect lines drawn in the opposite direction.
Group Comparison
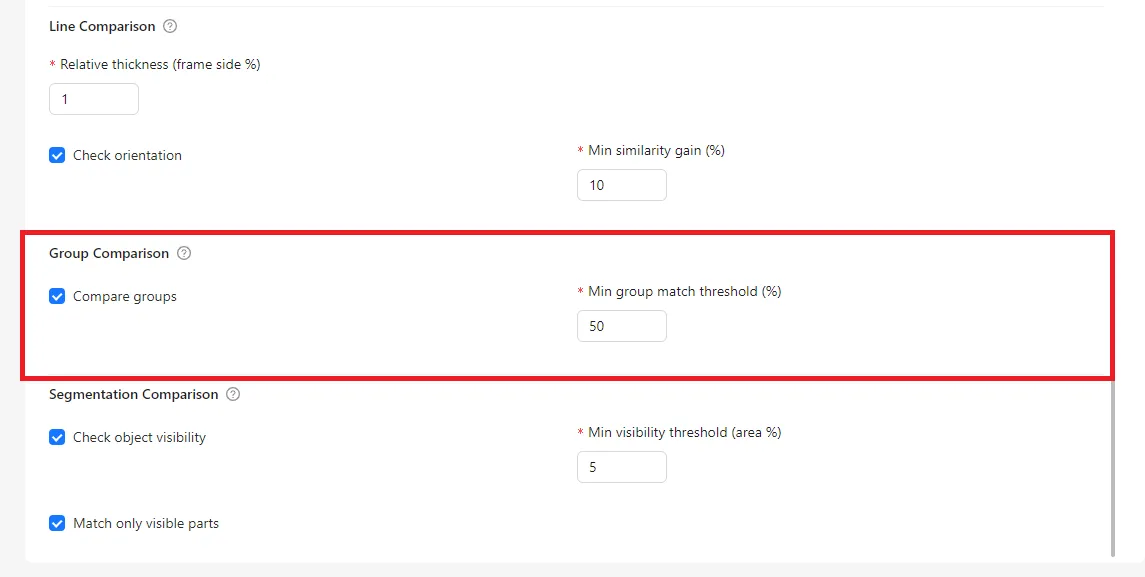
Group Comparison is used to verify logical relationships between objects.
When this option is enabled, CVAT evaluates groups as a whole rather than individual objects only. Objects in the annotated group are compared with objects in the reference group.
The group match threshold defines how many objects must match for the group to be considered correct. If the number of matching objects is below this threshold, the system reports a group mismatch.
This check helps ensure that objects are not only annotated correctly, but also organized into meaningful and correct groups.
Segmentation Comparison
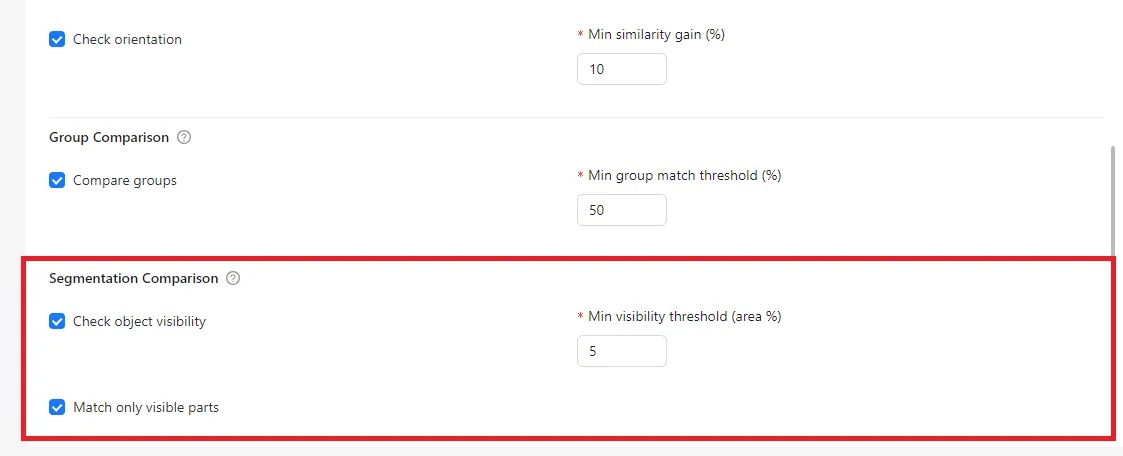
For masks and polygons, CVAT supports:
- Visibility checks for overlapping objects
- Minimum visibility thresholds
- Optional comparison of only visible parts
These settings help detect errors caused by incorrect layer ordering or excessive occlusion.
Overview and Reporting
The Overview page summarizes annotation quality at task and project levels. It displays:
- Mean annotation quality
- Numbers of correct, missing, and extra annotations
- Warnings and errors
- Job-level and task-level statistics
Quality reports can be downloaded in JSON or CSV format for further analysis.
Conclusion
CVAT’s Quality Control tools provide a comprehensive framework for managing annotation quality at scale. Ground Truth and Honeypots address different validation needs, while flexible metrics and comparison settings allow teams to tailor quality checks to their workflows.
By carefully selecting validation strategies, configuring metrics appropriately, and interpreting results correctly, teams can ensure consistent, high-quality annotations while keeping annotation costs under control.


.jpg)
.svg)
.png)

.png)


